Easify V4 is no longer supported and has been superseded by Easify V5.
Security - Users
Each person that uses Easify must have an Easify user account. When you first install Easify a single user named Administrator is created.
The administrator account has full permissions for all areas of Easify and is intended for use by managers or owners to administer Easify. We recommend that you choose a strong password for the administrator account and do not disclose it to anyone. Anyone else that requires access to Easify should have their own user account, these can be easily created as required.
User accounts in Easify are used not only for security i.e. when you login to Easify, but are also used to assign users to jobs, to record users hours from time-sheets, and to log events to the Easify history log. Creating and using user accounts greatly increases the power of Easify within your organisation.
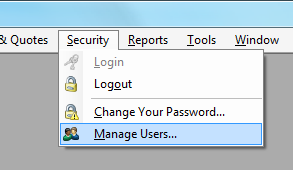
Additional Easify user accounts are created within Easify via the Security -> Manage Users menu on the main Easify window.
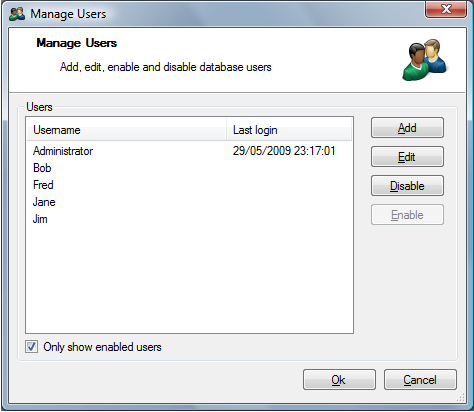
The Manage Users window displays a list of all the Easify users that have been created, and allows you to Add / Edit / Disable user accounts as desired.
Adding New Users
To add a new user, simply click the Add button in the Manage Users window.
The Add New User window will appear.
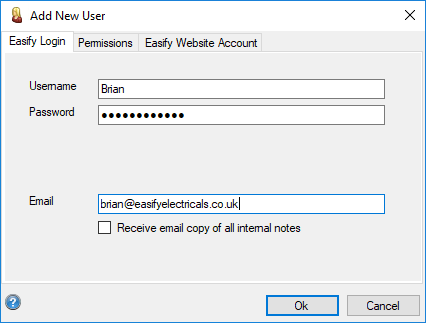
To create a new user, fill out the following required information.
Username: Enter a username for the user. This will be the username that they log into easify with, and will also be the name that Easify uses when referring to that user for instance when assigning users to orders.
Password: Enter a password for the user. This will be the password they use when logging into Easify.
Email: If the user has an email address you can enter it here. If you choose to use the internal notes system within the Orders & Quotes section of Easify, copies of internal notes will be sent to this address.
Receive email copy of all internal notes: Tick this box and the user will receive a copy of every internal note added to orders in Easify, even if they are not assigned to the order. This is a handy feature for managers that wish to be kept up to date on all notes that flow through Easify.
Click the Ok button to create the new Easify user.
Editing Users
To edit a users details, select the user in the Manage Users window and click the Edit button.
Easify Login
The first page of the Edit User window is the Easify Login tab. Here you can edit the Username, Password and Email address of the user.
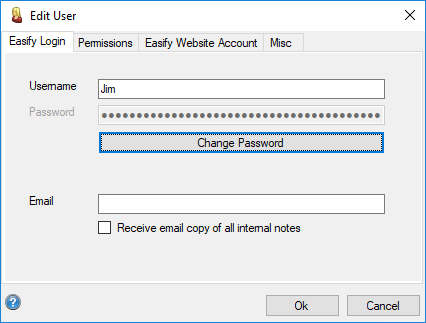
To change the users password, click the Change Password button.
Permissions
The next page of the Edit User window is the Permissions tab.
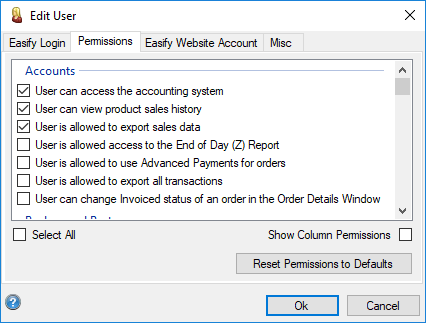
Here you will see a list of all available Easify permissions showing which permissions the selected user has been granted. Click here for a full list of Easify Permissions and their meanings.
Show Column Permissions: Users can choose what columns of data appear in the main Easify screens such as Customers, Orders, Purchases and Products. Ticking this box will show the user permissions that allow or deny users from viewing the columns in the main Easify screens. There are a lot of columns that the user can have permission set for, so these are hidden by default in order to reduce clutter.
Reset Permissions to Defaults: Click this button to apply the default set of user permissions for a user. Note that this will give the user a very restrictive set of permissions, and they will only be given basic access to columns.
Reset users hidden message boxes so that they all show again: As users use Easify, some of the message boxes that appear have the option to "Don't show me this again". The need may arise to re-enable the display of a message box that was once hidden, clicking this button will reset all of the message boxes in Easify so that they will appear again.
Associate Easify Website User Account
The next tab of the Edit User window is the Associate Easify Website User Account tab.
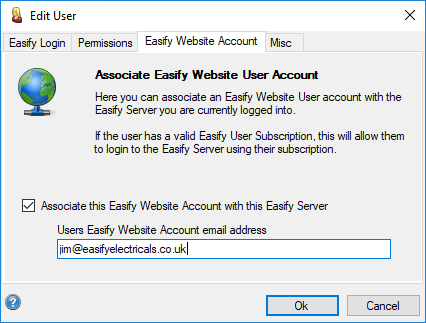
This is where you associate Easify Website User accounts with the Easify Server you are currently logged into.
To associate a user, tick the Associate this Easify Website Account with this Easify Server checkbox, and enter their email address where it says Users Easify Website Account email address.
If the user has a valid Easify User Subscription, this will allow them to login to the Easify Server using their subscription.
Misc
The final page of the Edit User window is the Misc tab.
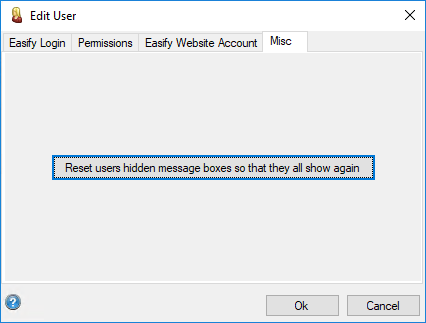
Here you can reset any messages that had previously been hidden by the user.
Disabling User Accounts
In order for Easify to maintain the integrity of your data, you are not permitted to delete Easify user accounts. Instead you have the option of disabling user accounts that you no longer need.
To disable a user account, simply select the user whose account you wish to disable, and click the Disable button.
The Only show enabled users tick box in the Manage Users window allows you to choose to only view active user accounts. If you wish to view user accounts that have been disabled untick this box. You can re-enable a disabled user account by selecting the disabled account and clicking the Enable button.

