Easify V4 is no longer supported and has been superseded by Easify V5.
Easify Connection Manager
Overview
Easify Pro can connect to Easify Servers on your local network, and also remotely via the internet.
When you launch Easify Pro you are presented with a list of known Easify Servers in the Company Picker that you can log into.
The Easify Connection Manager allows you to manage connections to your Easify Servers, and also allows you to automatically discover Easify Servers that do not yet appear in the Company Picker.
Launching the Easify Connection Manager
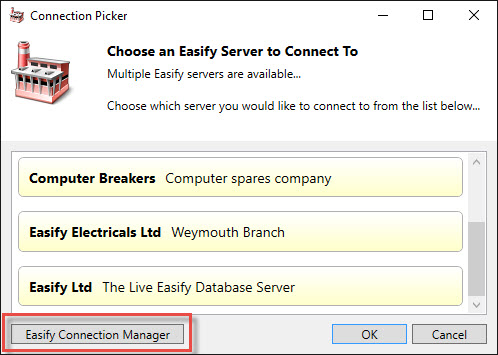
You can launch the Easify Connection Manager by clicking the Easify Connection Manager button in the Company Picker window.
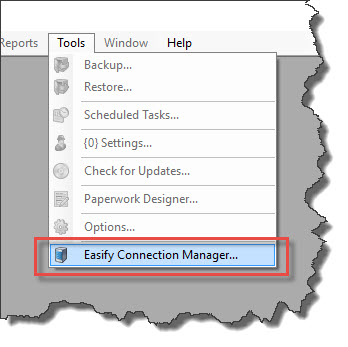
Alternatively you can launch the Easify Connection Manager via the Easify Pro main menu. Tools->Easify Connection Manager.
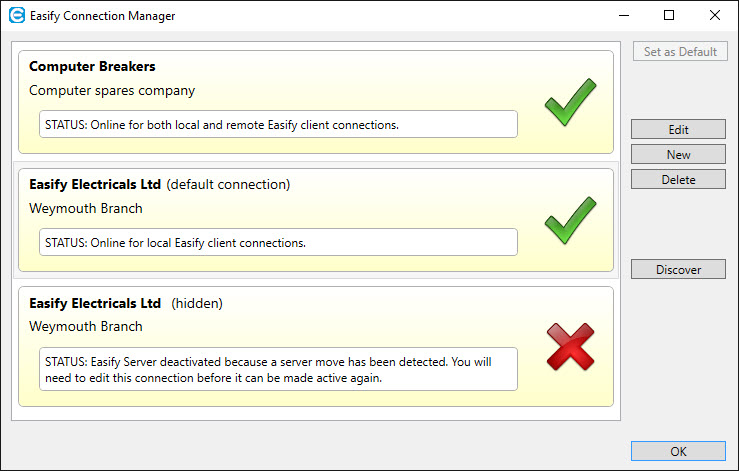
The Easify Connection Manager displays a more detailed view of the Easify Servers that were present in the Company Picker window.
Easify Connection Manager Main Features
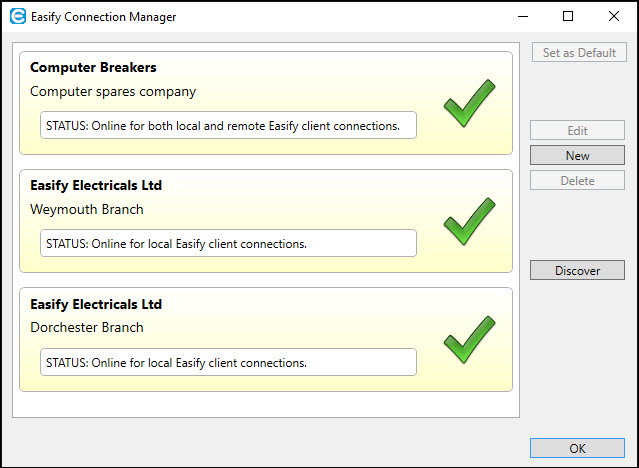
Each Easify Server (company) is represented by a light yellow panel that displays information about each server.
The first line in each panel is the Company Name.
You can set any of the companies to be the Default Company by selecting it and clicking the Set as Default button. When a company is set as the default company, it will be automatically selected when the Company Picker is displayed, and all you need to do is click the OK button in the Company Picker to proceed to login to the default company.
The second line in a panel is the Company Description.
The white panel displays the status of the server connection.
In the example above you can see that Computer Breakers is online and is accepting both local and remote connections.

Easify Electricals Ltd (Default connection) is showing a status of online for local connections.
You can see that the third server is also shown as Easify Electricals Ltd - Weymouth Branch, but it has a large red cross on it and the status is "Easify Server deactivated because a server move has been detected...".

Click here to learn more about repairing a damaged Easify Server.
Discovering New Servers
If new Easify Servers have been added to your network, or have been made available to you via the internet, you can discover them by clicking the Discover button.
Click here to learn more about Easify Server Discovery.
Deleting a Server
To delete an Easify Server from the Easify Connection Manager, select it by clicking on it and click the Delete button.
Adding a New Server
The New button will launch the Easify Server Editor allowing you to manually enter server connection details. You should only use this option if instructed to do so by Easify technical support.
To add a new server connection you should use the Discover button which will be discussed in a subsequent article.
Click here to learn more about Easify Server Discovery
Editing a Server Connection
To Edit a server connection, select it in the list of servers shown in the Easify Connection Manager and click the Edit button.
In order to edit a server you will need to provide credentials of a user that has permission to edit the selected server.
Click here to learn more about Easify Server Editing permissions.
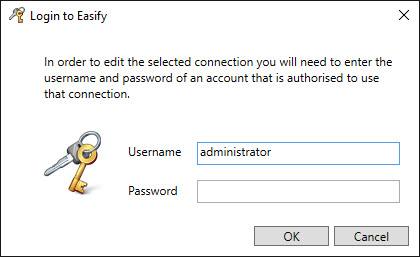
Enter the credentials of a user with permissions to edit the selected server and click the OK button.
If your credentials are accepted, the Server Editor window will be displayed.
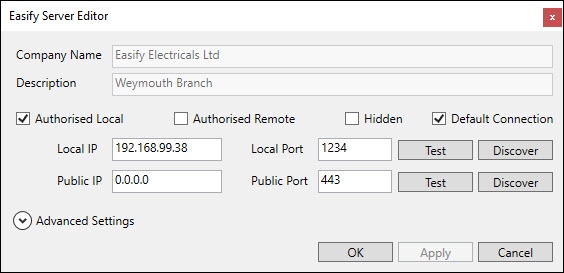
Company Name and Company Description are read only and cannot be edited.
The Authorised Local checkbox determines whether the server is authorised to accept Easify Client connections on the local network. Typically this box is ticked to allow the Easify Server to communicate with clients on the local network.
The Authorised Remote checkbox determines whether the server is authorised to accept Easify Client connections from the internet, and also to allow connections from your external website. Tick this box if you want your Easify Server to be reachable over the internet.
The Hidden checkbox determines whether the server is visible in the Easify Company Picker. Set this value to hidden if you want the server to be hidden from Easify users.
If the Default Connection checkbox is ticked, this connection will be used as the default connection in the Easify Company Picker if you don't select a connection before clicking OK.
Local IP and Local Port determine the IP address and TCP port number that the server accepts client requests from on your local network. Typically you should not change these values as they are determined by the Easify Server itself.
The Test button will attempt to contact the server at the specified IP address and Port. You will receive a pop up message telling you whether the test succeeded or not. This is a useful way of checking that a server is reachable on your network.
The Discover button will attempt to contact the server at the specified IP address and Port and refresh the connection data related to the server. Typically you would only use this feature if instructed to do so by Easify technical support.
Public IP and Public Port determine the IP address and TCP port number that the server accepts requests from on the internet. Typically you should not change these values as they are determined by the Easify Server itself. However if your server is behind a load balancing router with more than one public IP address you will need to specify which actual IP address the server is listening on. Also if you wish to use a non standard port for your server to listen on for internet traffic, you can specify a different port number here.
Advanced Settings can be expanded to display advanced information about the server. Typically you would only need this information if requested by Easify technical support to assist in troubleshooting a server problem.
Repairing a Server
If you have a server that has disabled itself due to detecting that it has been moved since it last successfully ran, you can repair it via the Easify Connection Manager.

A server will enter this state if it detects that it is running a database from a different server, or if it detects that its physical location has changed - as might be the case if you restored the server files to a different server.
To begin the repair process we will use the example where we copied the Easify Electricals (Weymouth) database over the Easify Electricals (Dorchester) database. In this scenario the Easify Electricals (Dorchester) server detected a problem when it started, and rather than carry on regardless it disabled itself to prevent people inadvertently using the wrong database.
Select the damaged server, and click the Edit button.
When prompted, enter login credentials of an Easify user that has permission to edit the selected server.

If your credentials are accepted, the Server Move Wizard window will be displayed (because this server has detected that it has moved or been restored).
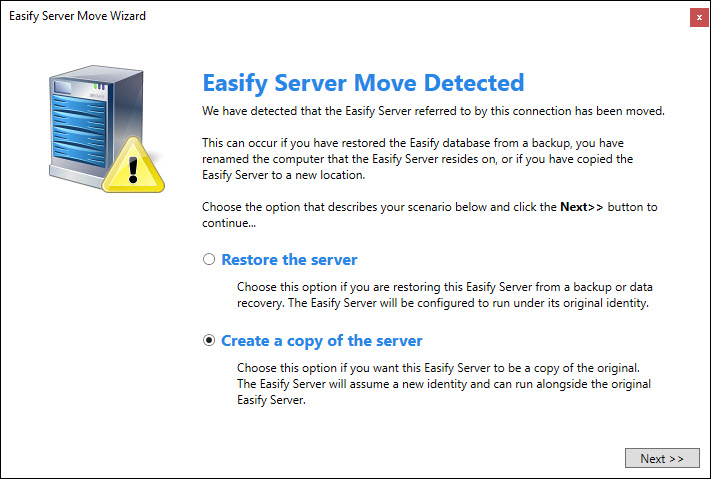
The Server Move Wizard will provide you with two options.
Restore the Server
Choose this option if you are restoring the server after recovering from a disaster. For instance if your server failed and you have brought up a new server and copied all your Easify server files over to it, you would need to choose this option.
Restoring a server brings it back onto your network with exactly the same identity (company name and description) as it had before.
Create a copy of the server
Since in this scenario we copied the Easify Electricals (Weymouth) database over the Easify Electricals (Dorchester) database, what we want to do is tell the Server Move Wizard that we want to repair this server by making it into a copy of the original server. In other words, we want to bring this server back online with a new identity (new company name or description).
Select the Create a copy of the server option and click the Next >> button.
On the next page of the wizard you have the opportunity to change the company name and/or description. After all, if you want the server to be a copy of the original you will need to rename it somehow.
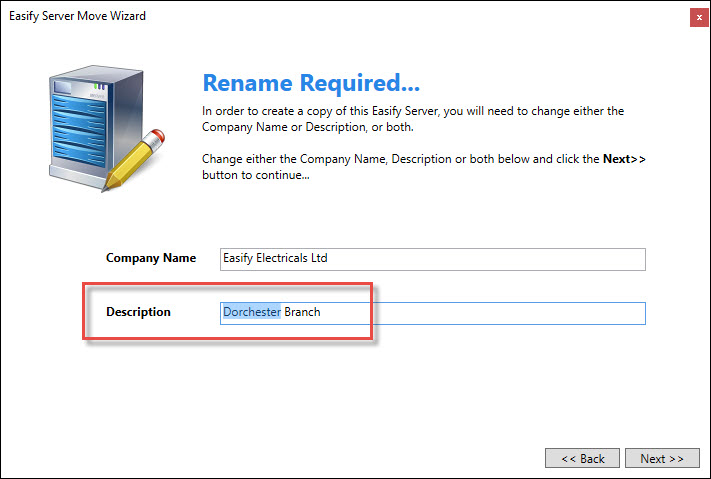
Here we have renamed "Weymouth Branch" to be "Dorchester Branch". The company name has been left as it is.
Clicking the Next >> button takes you to the authorisation page of the wizard.
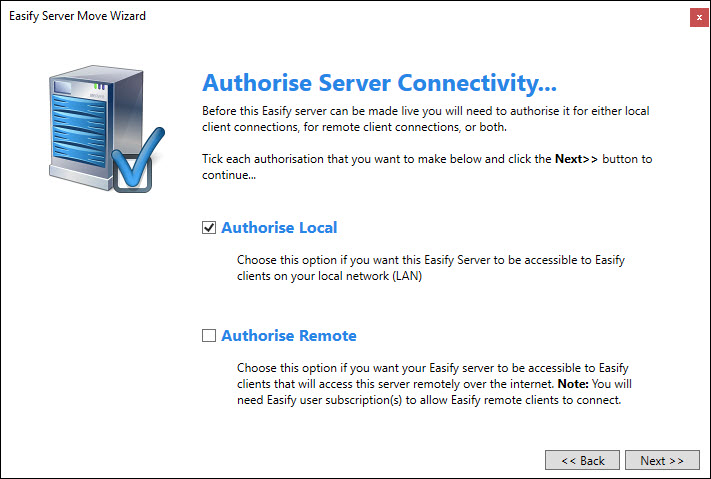
One of the side effects of a server detecting that it has been moved, is to de-authorise itself from local and remote connections. here you can choose whether to authorise local and/or remote connectivity.
We select Authorise Local and click the Next >> button to proceed.
All things being well you will be greeted with the final page of the wizard.
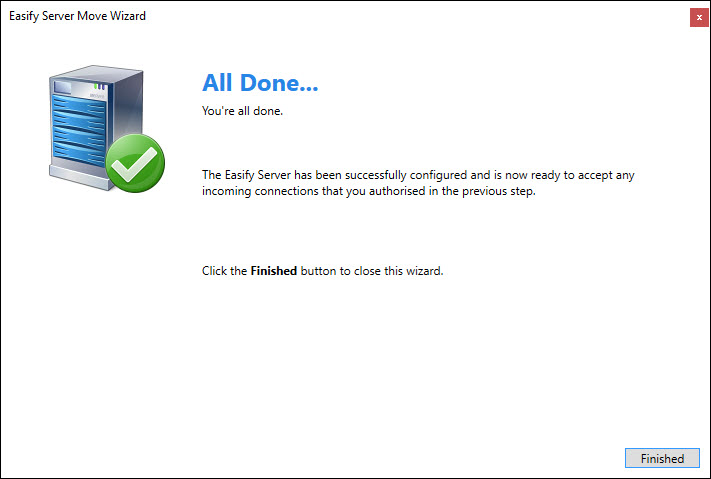
When you click the Finished button you will be shown the Server Editor window.
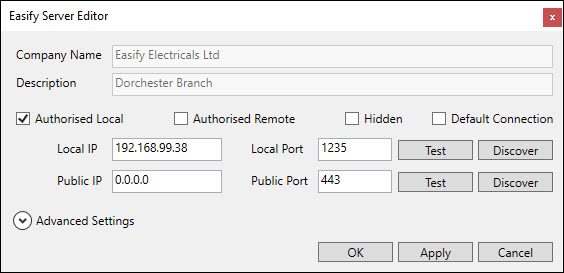
Note that the company description has been changed to "Dorchester Branch" and that Authorised Local is ticked.
Click the OK button in the Server Editor.
Notice that the server that previously had an error is now showing a healthy status, and that its identity has been changed to Easify Electricals (Dorchester).
