Installing a PartnerTech CD7220 Pole Display
Overview
This article will walk you through installing a PartnerTech CD7220 POS Pole Display on your PC.
Choose your operating system...
This guide is available in two versions, one for Windows 7 and one for Windows 8 or later.
Click the image below to select the relevant version of this article.
Windows 7 Guide - First Things First...
If you are running Windows 7, we need to know if you are running a 32-bit or 64-bit version:
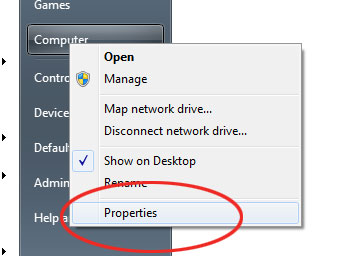
In Windows, click the start button, right click Computer and select Properties.
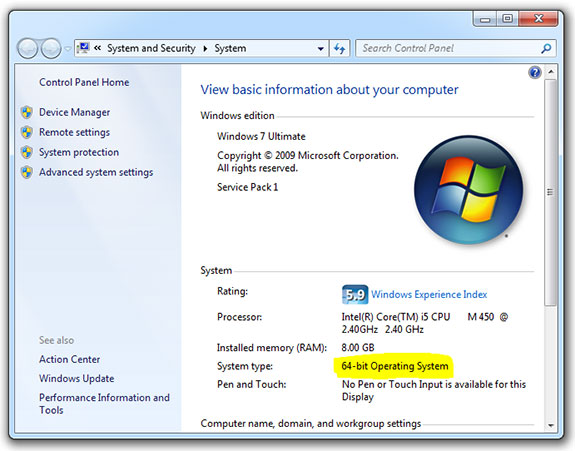
In the next Window have a look at the System Type as highlighted in yellow below. This will tell you if you have a 32 or 64 bit installation of Windows.
Is your computer 64-bit or 32-bit?
This section is for users who have 64-bit Windows, if you are using 32-bit Windows please select the 32-bit tab above.
If you have 64-bit Windows you can download the partnertech CD7220 64-bit drivers here .
Save the driver to your desktop and extract the Partnertech_CD7220_64bit_drivers.exe file to your desktop.
Double click Partnertech_CD7220_64bit_drivers.exe to launch it.
If you get a prompt telling you to plug in your USB pole display you can do so now.
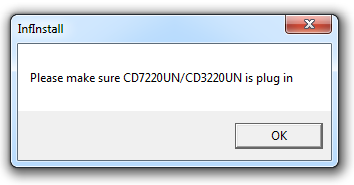
Click OK once you have plugged the CD-7220 pole display into the USB port.
When you plug in the CD-7220, Windows will attempt to install a driver for the device, but since we haven't installed the drivers yet this will fail. If you get a warning that the CD-7220 device driver software was not successfully installed, this is perfectly normal and the error can be ignored.

In the Partner driver installer there are two steps to installing the drivers.
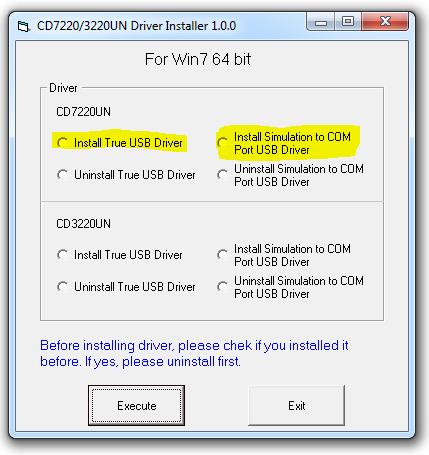
First, in the CD7220UN section select Install True USB Driver and click the Execute button.
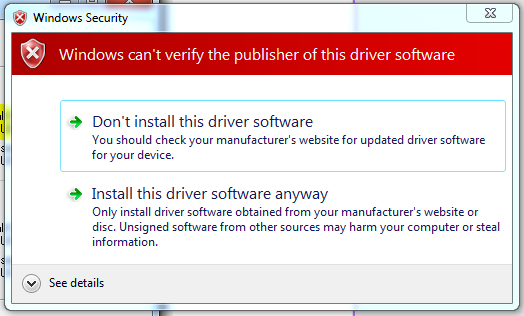
If you get a warning about the driver publisher, choose the option Install this driver software anyway.
When installation is complete, select the Install Simulation to COM Port USB Driver option in the CD7220UN section, and again click the Execute button.
Again, if you get a warning about the driver publisher, choose the option Install this driver software anyway.
Your Partnertech CD7220 pole display drivers are now installed and ready for use with Easify. The next section will explain how to set the pole display up with Easify...
This section is for users who have 32-bit Windows, if you are using 64-bit Windows please select the 64-bit tab above.
If you have 32-bit Windows you can download the partnertech CD7220 32-bit drivers here .
Save the driver to your desktop and extract the Partnertech_CD7220_32bit_drivers.exe file to your desktop.
Double click Partnertech_CD7220_32bit_drivers.exe to launch it.
If you get a prompt telling you to plug in your USB pole display you can do so now.
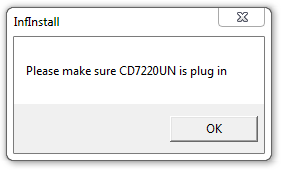
Click OK once you have plugged the CD-7220 pole display into the USB port.
When you plug in the CD-7220, Windows will attempt to install a driver for the device, but since we haven't installed the drivers yet this will fail. If you get a warning that the CD-7220 device driver software was not successfully installed, this is perfectly normal and the error can be ignored.

In the Partner driver installer there are two steps to installing the drivers.
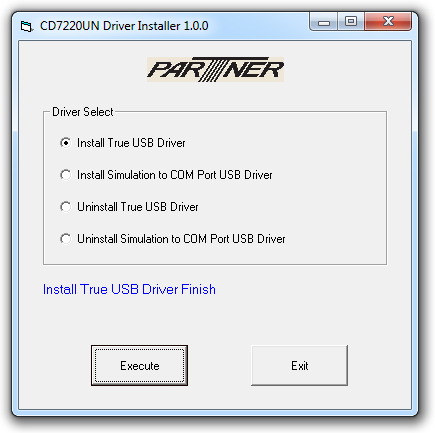
First select Install True USB Driver and click the Execute button.
When installation is complete, select the Install Simulation to COM Port USB Driver option and again click the Execute button.
Your Partnertech CD7220 pole display drivers are now installed and ready for use with Easify. The next section will explain how to set the pole display up with Easify...
Finishing up the Windows 7 installation...
Now that you have the pole display plugged in and the drivers installed, the pole display will light up and display the CD7220 rolling demo.
The next step is to find out which COM port the display has been assigned in windows so that you can enter this into Easify.
In Windows, click the start button, right click Computer and select Properties.

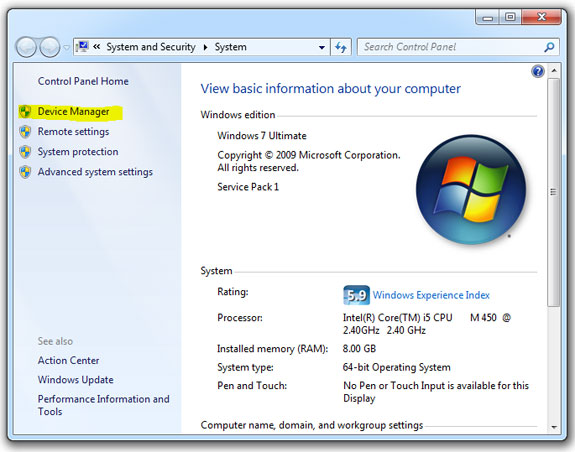
In the next Window click Device Manager as highlighted in yellow below:
In Device Manager, expand Ports (COM & LPT)
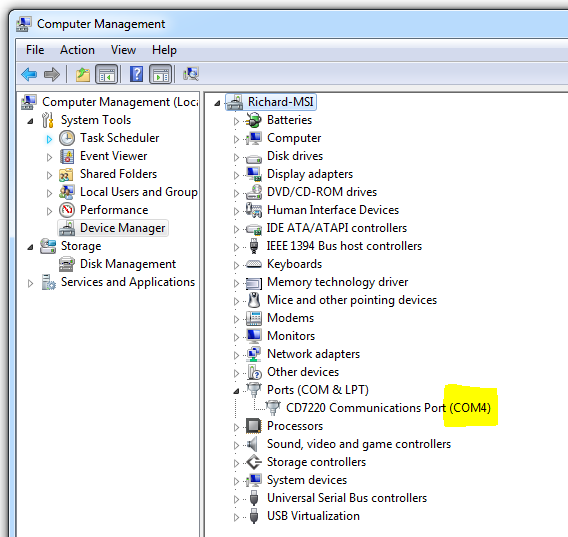
Make note of the COM Port number that the pole display has been assigned.
Finally, launch Easify and in the Easify main menu select Tools > Options.
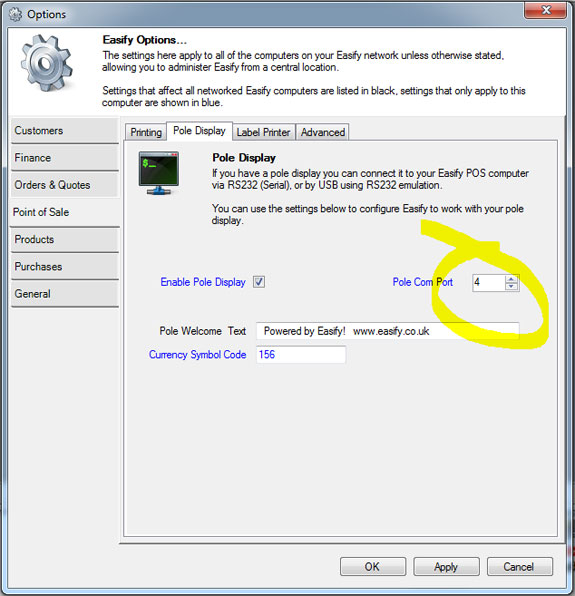
Locate the Point of Sale tab, and within the Point of Sale tab select the Pole Display tab.
Set Pole Com Port to match whatever the COM Port number obtained via Device Manager was.
Click OK when done, and close and re-open Easify to apply the new Com Port settings.
Your pole display is now ready for use with Easify at your point of sale.
Windows 8 Guide - First Things First...
If you are running Windows 8, we need to know if you are running a 32-bit or 64-bit version:
In Windows, click the start key on your keyboard or the start button located in the bottom left of the screen.
Now type the word system and select See if you have a 32-bit or 64-bit version of Windows
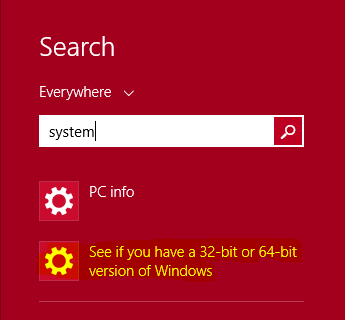
On this next screen you can find the information you are after, as highlighted below in what my computer came up with.
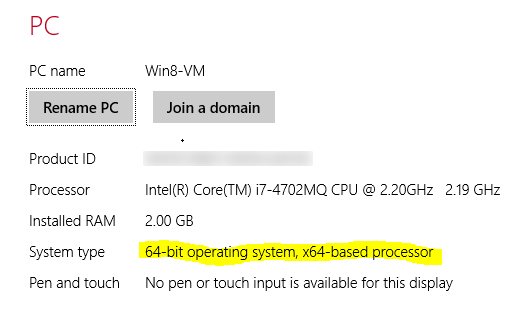

Is your computer 64-bit or 32-bit?
This section is for users who have 64-bit Windows 8, if you are using 32-bit Windows please select the 32-bit tab above.
If you have 64 bit Windows 8 you can download the partnertech CD7220 64-bit Windows 8 drivers here.
Save the driver to your desktop and extract the CD7220_WIN8_Install_130729.exe file to your desktop.
Double click CD7220_WIN8_Install_130729.exe to launch it.
If you get a prompt telling you to plug in your USB pole display you can do so now.
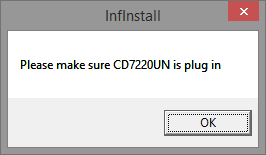
Click OK once you have plugged the CD-7220 pole display into the USB port.
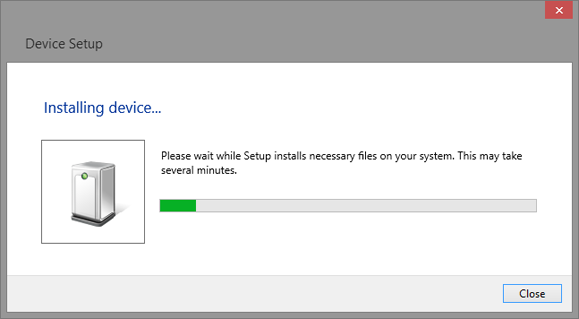
When you plug in the CD-7220, Windows will attempt to install a driver for the device, but since we haven't installed the drivers yet this will fail. If you get this Device Setup screen, just wait for it to complete or click the Close button.
In the Partner driver installer there are eight different options, we're only interested in one, Install Simulation to COM Port USB Driver , as highlighted:
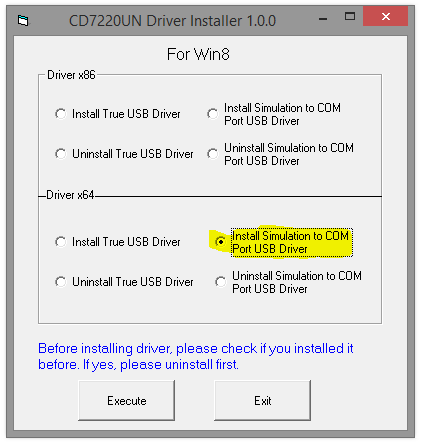
So select the Install Simulation to COM Port USB Driver under the Driver x64 section and click Execute.
If you get a warning about the driver publisher, choose the option Install this driver software anyway.
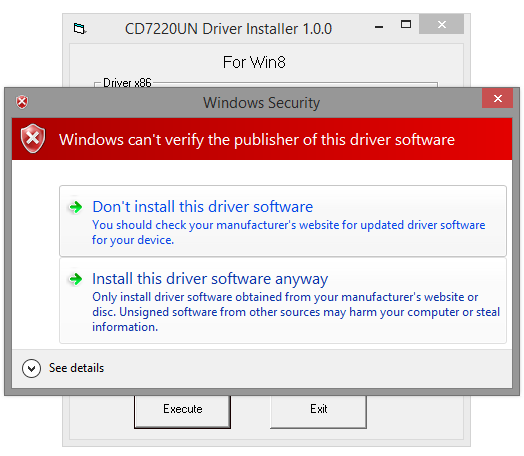
Your Partnertech CD7220 pole display drivers are now installed and ready for use with Easify.
This section is for users who have 32 bit Windows 8, if you are using 64 bit Windows 8 please select the 64-bit tab above.
If you have 32 bit Windows 8 you can download the partnertech CD7220 32 bit Windows 8 drivers here .
Save the driver to your desktop and extract the CD7220_WIN8_Install_130729.exe file to your desktop.
Double click CD7220_WIN8_Install_130729.exe to launch it.
If you get a prompt telling you to plug in your USB pole display you can do so now.

Click OK once you have plugged the CD-7220 pole display into the USB port.
When you plug in the CD-7220, Windows will attempt to install a driver for the device, but since we haven't installed the drivers yet this will fail. If you get this Device Setup screen, just wait for it to complete or click the Close button.

In the Partner driver installer there are eight different options, we're only interested in one, Install Simulation to COM Port USB Driver, as highlighted:
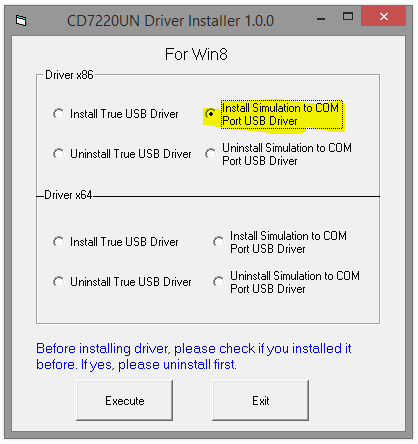
So select the Install Simulation to COM Port USB Driver under the Driver x86 section and click Execute.
If you get a warning about the driver publisher, choose the option Install this driver software anyway.

Your Partnertech CD7220 pole display drivers are now installed and ready for use with Easify.

Finishing up the Windows 8 installation...
Now that you have the pole display plugged in and the drivers installed, the pole display will light up and display the CD7220 rolling demo.
The next step is to find out which COM port the display has been assigned in windows so that you can enter this into Easify.
In Windows, click the start key on your keyboard or the start button located in the bottom left of the screen.
Now type the words device manager and select Device Manager from the search results.
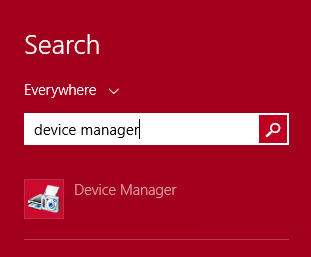
In Device Manager, expand Ports (COM & LPT)
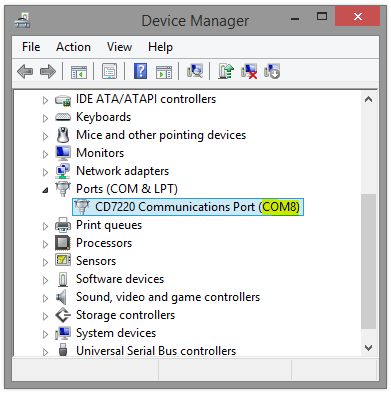
Make note of the COM Port number that the pole display has been assigned.
Finally, launch Easify and in the Easify main menu select Tools > Options.
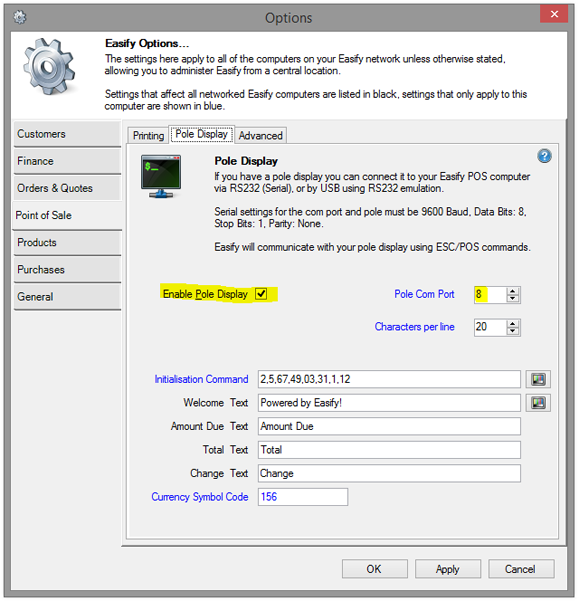
Locate the Point of Sale tab, and within the Point of Sale tab select the Pole Display tab.
Make sure there is a tick in the Enable Pole Display check box. Then set Pole Com Port to match whatever the COM Port number obtained via Device Manager was.
Click OK when done, and close and re-open Easify to apply the new Com Port settings.
Your pole display is now ready for use with Easify at your point of sale.
About Easify
Easify is a software package for Windows that helps you to run your small business.
It includes all the tools you need to run your small business - everything from EPOS and stock control to invoicing and VAT returns.
Click here for an overview of Easify.


