Product Stock Take
Overview
The Stock Take feature of Easify Web allows you to use your smartphone camera as a mobile barcode scanner. Simply scan your products into your phone, and your Easify product stock levels will be updated in real-time...
You don't have to use a smartphone for stock taking though, Easify Web will also work on a tablet, laptop, PC or Mac.
The ability to do a stock take is fundamental to any business with physical products, and the ability to automate this process is built into Easify stock control software.
With Easify Web you can log into your Easify Server with your smartphone, tablet or laptop, and scan or key in your product stock codes, Easify Web will retrieve the basic product details and display them and you simply tap in the quantity of the product you have on the shelf and Easify Web will update the stock level of the product in Easify.
The stock level update happens in real-time so there is no need to bulk upload stock levels to Easify, just scan, tap in the quantity and you're done.
Getting started
NOTE: In order to access Easify Web you will need a current Easify Cloud Subscription. You can purchase Easify Cloud subscriptions here .
First you will need to log into Easify Web using a web browser on a smartphone, tablet, laptop or PC.
Click here to login to Easify Web...
Click here to learn more about logging into Easify Web...
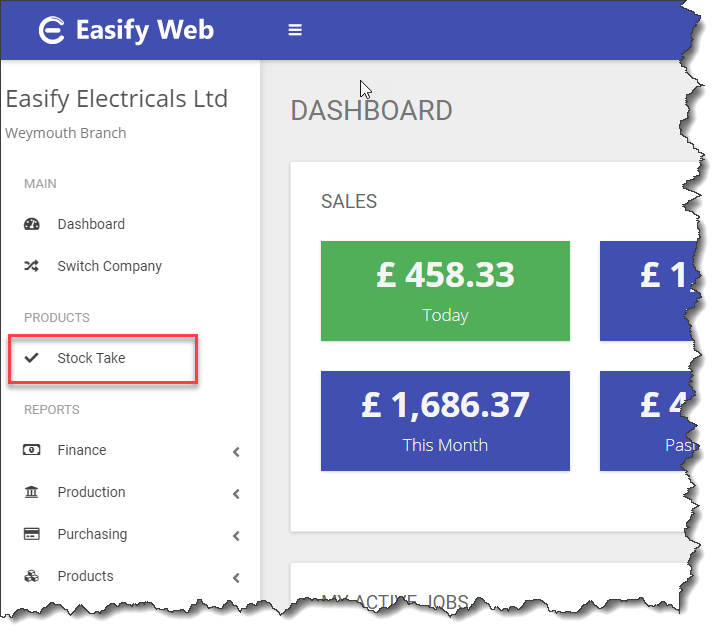
Once you have logged into Easify Web and are at the Dashboard, click the Stock Take menu option on the left.
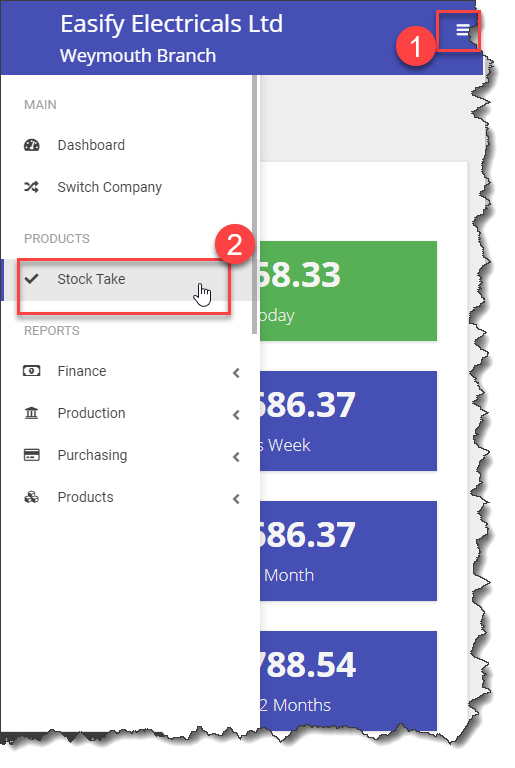
If you are logging in using a smartphone the Stock Take option (2) can be accessed by clicking the menu (1) in the top right of Easify Web.
Selecting a Product
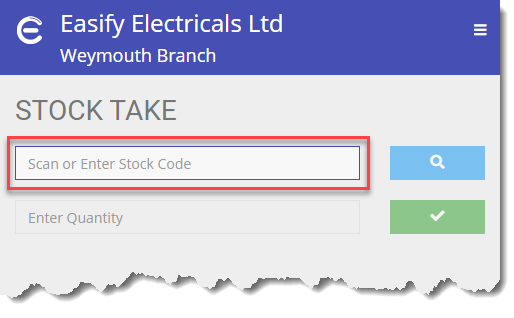
In order to update the stock level of a product, first you will need to either scan in its barcode, or type the stock code into the Scan or Enter Stock Code box.
You can enter any of the following types of stock code:*
- Easify SKU
- Our SKU
- Manufacturer SKU
- Supplier SKU
- EAN No.
* assuming that the relevant stock code has been entered into the product details in Easify. Click here to learn more about product details in Easify.
The easiest and quickest way to enter the stock code is to scan it as a barcode on the product.
If you are using Easify Web on a laptop or desktop computer you can connect a USB handheld barcode scanner, or use a wireless or Bluetooth scanner.
If you are using a smartphone you can either use a Bluetooth handheld barcode scanner paired to the phone, or you can install a barcode keyboard app and use the camera on your phone as a barcode scanner.
Click here to learn more about using a smartphone camera as a barcode scanner...
If you manually type in the stock code, you will need to manually tap the blue search button to load up the product details. If you use a barcode scanner and have it configured to append an Enter key press or carriage return line feed after the scan it will automatically click the search button after then scan.
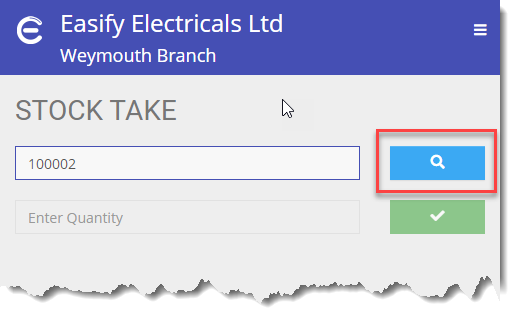
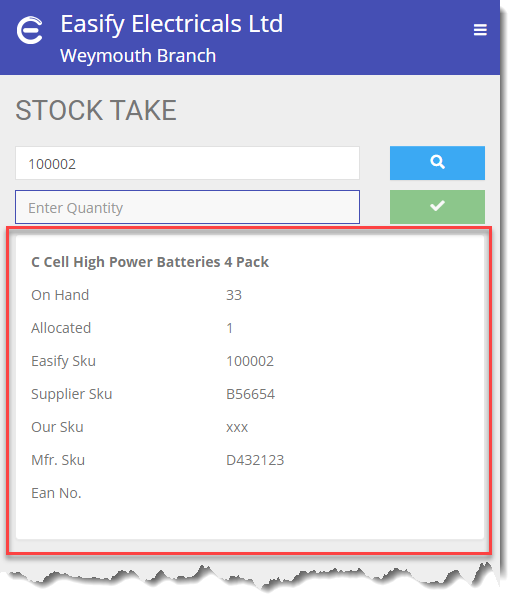
After you have scanned a product stock code, or manually entered it and tapped the search button, the product details will be displayed so you can make sure the correct product is being updated.
If the product could not be found you will get a warning that the product could not be found.
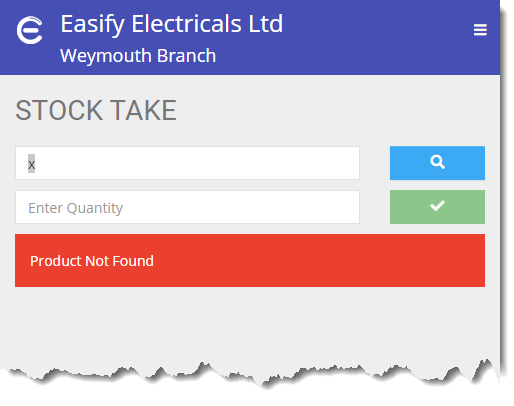
When a product is not found, the stock code will be automatically selected so that you can immediately scan another product without having to manually delete the incorrect stock code.
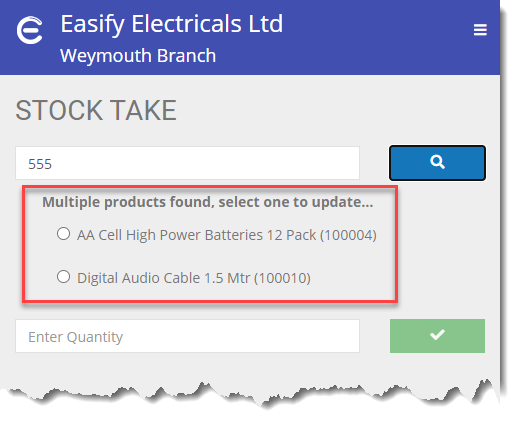
Sometimes you may have multiple products with the same stock code. If multiple products match the stock code that you entered, a list of matching products will be displayed and you can choose the one you want to update.
If the product that you have scanned in has been discontinued in Easify, the word 'Discontinued' will appear in red letters at the bottom of the product details.
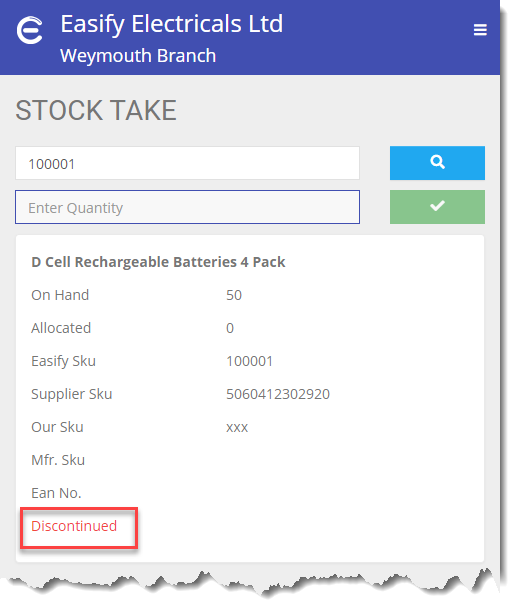
If the product is discontinued, you can still update its stock level.
If you no longer want the product to be discontinued you can change this in Easify Pro.
Updating the Stock Level
When you have scanned in a stock code and loaded a product, the Enter Quantity box will automatically be selected and all you need to do is enter the quantity of the product...
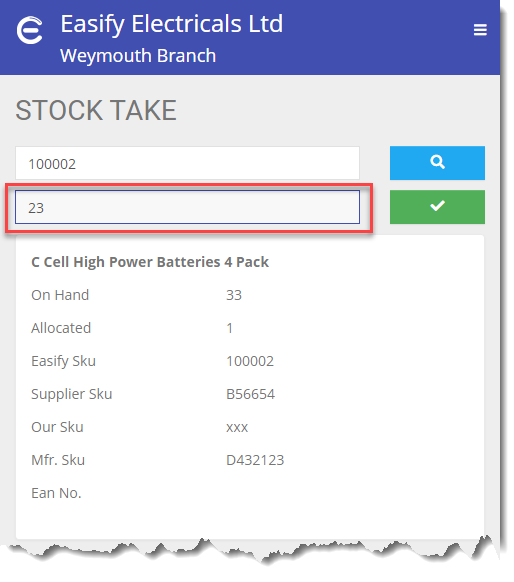
And then tap the green button to update the product quantity in Easify.
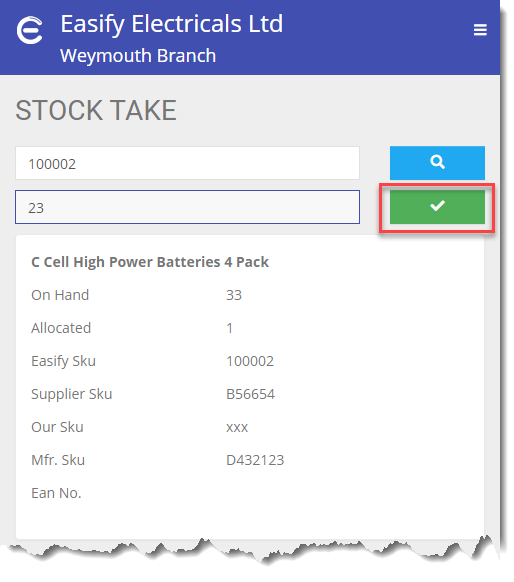
The stock level is instantly updated in Easify and you will get a message to tell you the stock level was successfully updated.
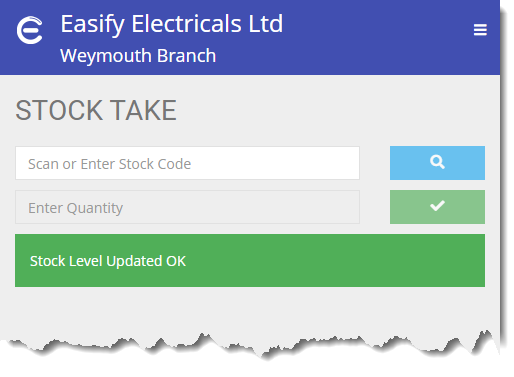
The Stock Take page will then reset itself automatically, ready for you to scan the next product.
When you update a product stock level, the value you enter replaces the stock level in Easify, it doesn't add to it.
Stock Takes and Easify Pro
The product Last Stock Check date value is updated when you update a product stock level. This means you can go into Easify Pro and view the Last Stock Check column and sort it to see which products have been stock checked and when.
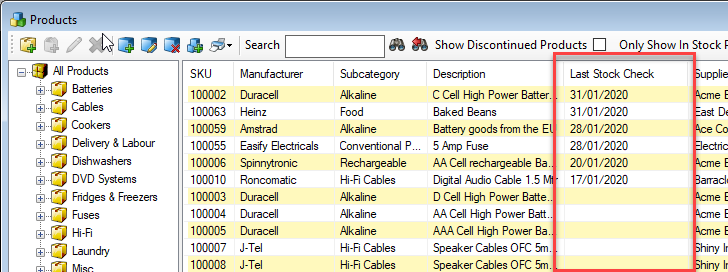
This way you can see which products were stock checked on a particular date, and if you get to the end of your stock take and have products with a blank Last Stock Check date you will know that they weren't found during the stock take.
The Last Stock Check date also gets set if you manually edit stock level in Easify Pro, so you can also do stock taking directly in Easify Pro, although this will be slower than scanning the products in Easify Web.
NOTE: If you don't see the Last Stock Check column in the main Easify Pro Products window, right click in the Products window, select Choose Columns and enable the Last Stock Check column.
Permissions
There are a couple of permissions in Easify that you will need to be aware of relating to the Stock Take facility.
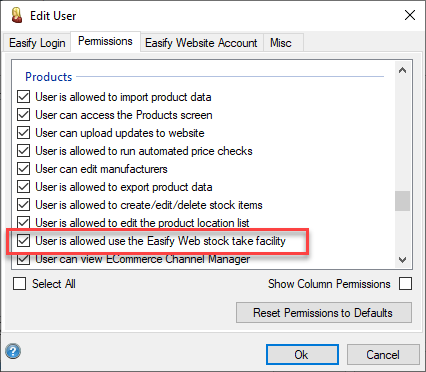
The first is that the user will need the Products -> User is allowed to use the Easify Web stock take facility permission. This allows them to access the Stock Take facility in Easify Web.
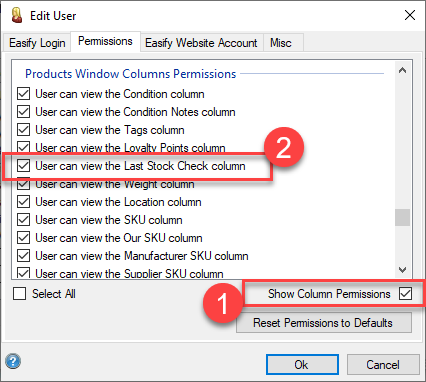
Secondly, in order to be able to view the Last Stock Check column permission in the main Easify Pro Products window, the user will need the User can view the Last Stock Check column under Products Window Columns Permissions.
NOTE: Be sure to click the Show Column Permissions checkbox (1) in the Permissions window in order to be abel to see the column permissions.
Click here to learn more about Easify Users and Permissions...

