Editing Multiple Products
Typically in Easify you will be editing a single product at a time. You open the product details by double clicking the product in the main Products screen, edit the product and then save your changes - no problem.
But what if you want to apply the same change to 2 products, 20 products or 200 products?
This is also no problem with Easify's ability to edit multiple products at once.
To edit multiple products, open the main Easify Products screen and select two or more products to edit.
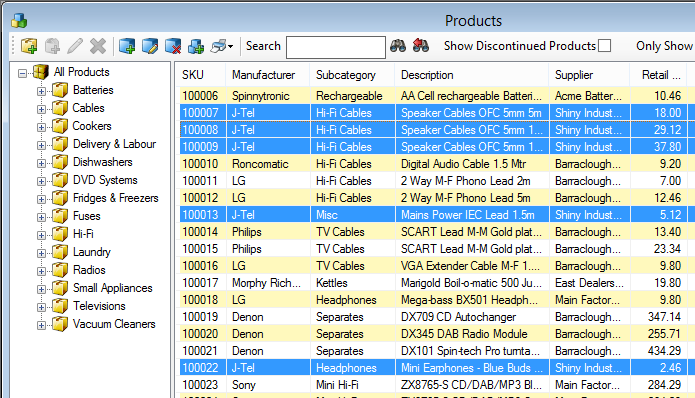
To select multiple products, click the first product that you want to edit to select it, then press and hold the [Shift] key and click to select the last product that you want to edit. All products between the first and the last one you clicked will be automatically selected.
If you want to select multiple products that are not next to each other in the list, press and hold the [Ctrl] key while clicking the products to select them.
When you have selected the products that you want to edit, right click one of the selected products to bring up the product context menu.
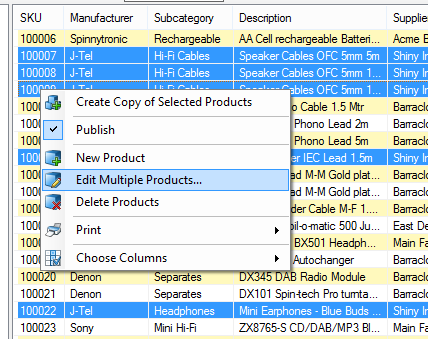
Click the Edit Multiple Products menu item to launch the Product Bulk Editor.
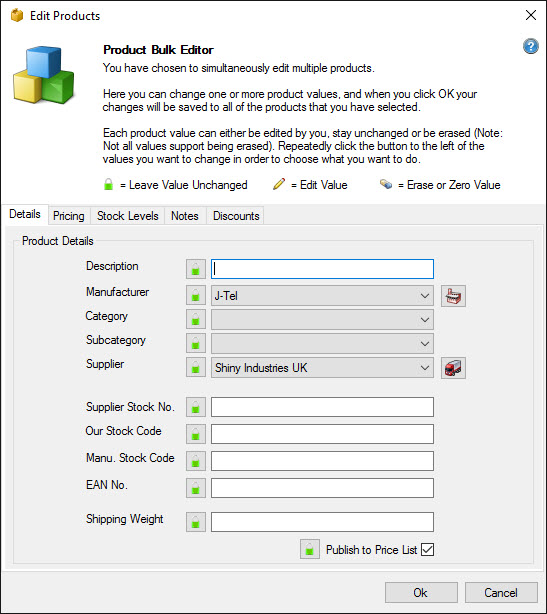
You will notice that the Product Bulk Editor looks like a souped up single product editor. It has a very similar layout to the single product editor but with the addition of buttons to the left of each field.
With each field in the Bulk Product Editor there are three things you can do. You can leave the field unchanged, you can change the fields value or you can erase the field.
The button to the left of each field indicates what will happen to the field. The button will contain one of the following images to indicate what will happen to its related field:
By default all fields will start off with a green padlock to say that the field will be unchanged.
You will also notice that some fields have values in them, and some fields are blank.
If a field has the same value for all of the selected products then the value will be populated into the field in the Bulk Product Editor. In the above example the Manufacturer is shown as J-Tel, this is because all of the products have the same manufacturer (J-Tel).
If the value of a field is different between the selected products then the field will be shown as blank. This does not necessarily mean that the field contains a blank value, it can mean that all of the products have a different value for the field so we show it as blank. In the above example the selected products have different Categories, so the category is shown as blank (because it wouldn't make sense to show multiple categories in one box).
Leaving Values Unchanged
To leave a value unchanged, click the button to the left of the value until it shows a green padlock, this tells the bulk editor to leave that value unchanged.
Leaving values unchanged is the default setting for all fields.
Editing a Value
To edit a value simply type the new value into the desired field, or for drop down lists select the desired value from the list.
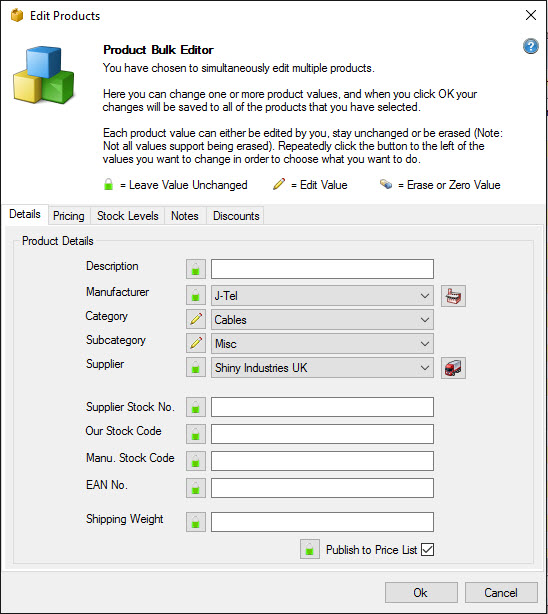
In the above example we have changed the category to be Cables, and the subcategory to be Misc. Note that the button image has changed to a yellow pencil to indicate that the value will be edited.
Erasing or Zeroing a Value
If you want to erase a value, or zero it, click the button next to the value until the image becomes an eraser.
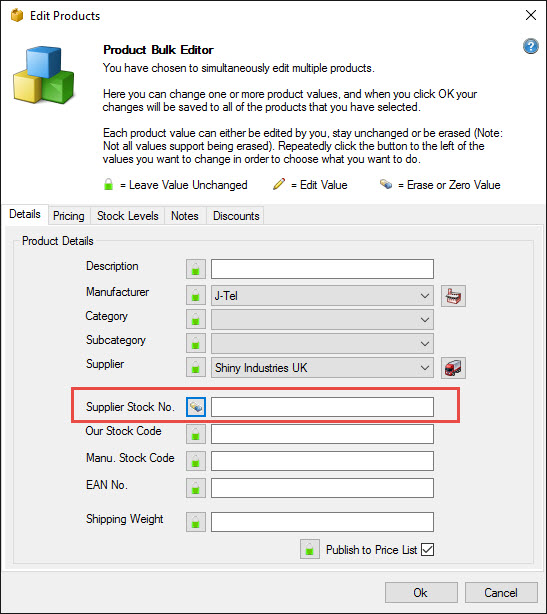
In the above example we have set the Supplier Stock No. value to be erased. This will cause the bulk editor to set the supplier stock no value to be blank for all selected products.

