Paperwork Designer - Working with Boxes and Lines
The Easify Paperwork Designer lets you easily add boxes and lines to your documents.
Adding a Line to a Document
In this example we are going to insert a blue line under our company logo on our invoices.
To insert a line into your document, first select the section that you want to place the picture in. To select a section simply left click within it on its background in the Document Designer. In this example the section we need to select is Document Header 1.
Click here for more information about Working with Sections.
Then click the Insert Box button (remember a line is just a box with three hidden sides).
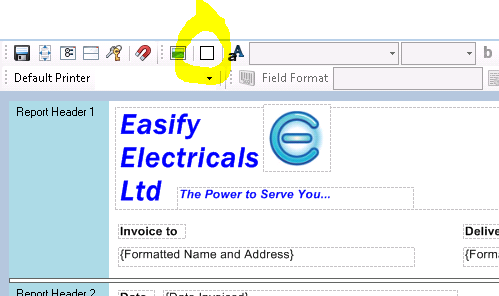
A box will appear in the top left of the selected section.
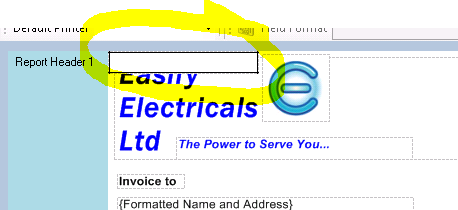
Next we need to move the box to be in roughly the correct position. In this case we're going to hide the left, bottom and right sides of the box to leave us with a single horizontal line across the top of the box. So the box needs to be moved by dragging it underneath our company logo...
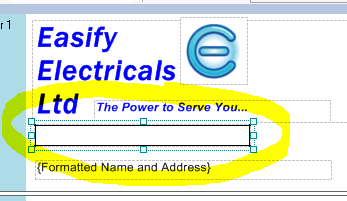
We've also widened the box to be the full width of the logo by dragging it's resize handles. The resize handles are the small boxes that appear around the box when it is selected. If you want to keep a box in its original proportions (aspect ratio) when you resize it, hold the [Shift] key while dragging it to its new size.
Next we need to hide the lower three sides of the box. With the box selected, click the Borders button and select Border Style->None from the flyout menu.
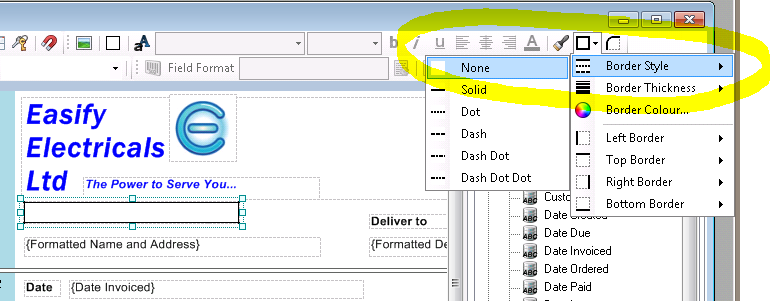
This removes all of the borders from the box. Next we will re-instate the top border which will become our line.
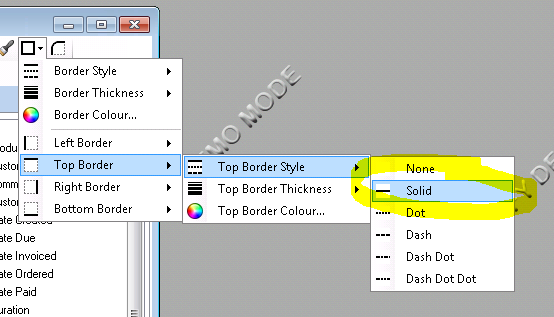
Now click the Borders button again and this time select Top Border->Top Border Style->Solid.
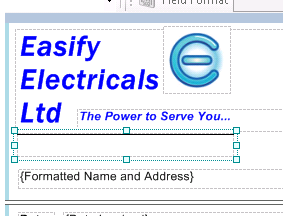
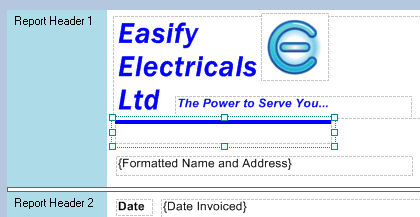
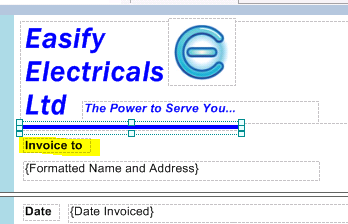
This gives us a line below the company logo, but presents two problems - First off the line needs to be thicker and coloured blue, and secondly the empty part of the box now obscures the text that says "Invoice to".
To change the line thickness, first make sure the line (box) is selected and click the Borders button and select Top Border->Top Border Thickness->3 pt.
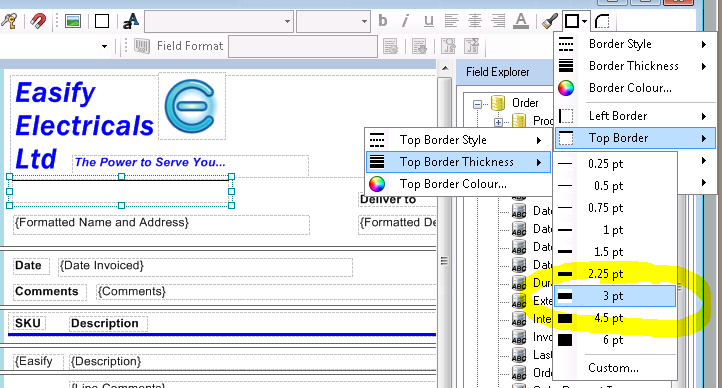
This gives us a nice thick line that is three points wide.
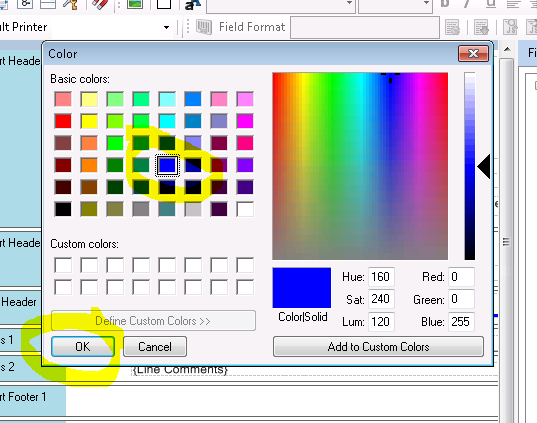
And to change the colour to blue, again with the line selected click the Borders button and select Top Border->Top Border Colour.
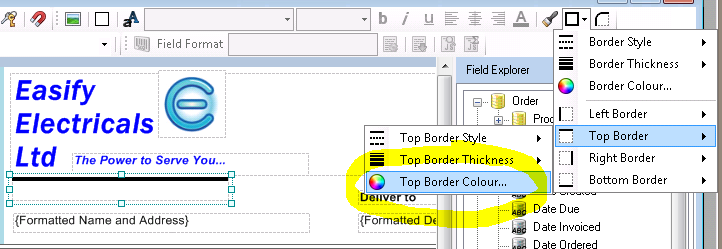
This will pop up the colour chooser. For this example we select the colour blue and then click OK.
The line is now the colour that we want...
The final step is to uncover the text that we accidentally obscured with the line. To do this simply resize the box that the line was created from so that it no longer obscured the text.
Grab the central resizing handle in the bottom edge of the box (highlighted in yellow below)...
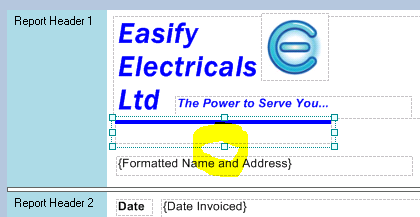
And drag it upwards so that the hidden text is revealed.
Adding a Box to a Document
We have already covered all you need to know about adding a box to a document in the exercise above. The only difference being that in the case of a box we would not hide any of its edges.
Setting the Background Colour of a Box
To change the background colour of a box, select the box in the Document Designer and click the Background Colour button.
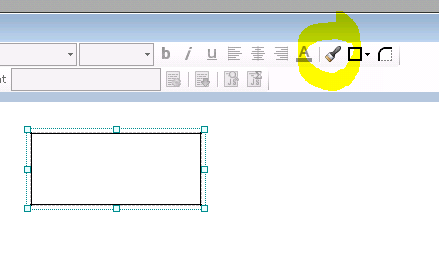
The colour chooser dialogue will pop up, select the background colour that you want and click OK when done.

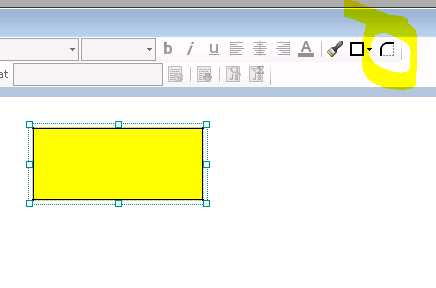
The background colour of the box will change to the colour you selected.

Box Corner Radius
The boxes that you add to your documents do not have to have square corners. Using the Corner Radius setting you can create boxes with rounded corners.
To create rounded corners, first select the box, then click the Corner Radius button.
In the resulting dialogue box enter your desired corner radius in millimetres and click OK when done.
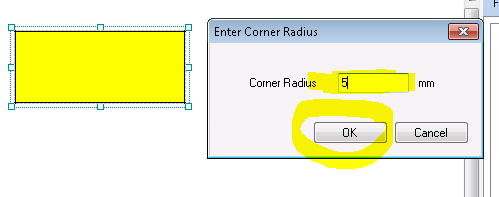
The selected corner radius will be applied to your box.

