Creating Product Categories and Subcategories
Not only can you enter all of your products and services into Easify, you can organise them into categories and subcategories too.
Spend a little time thinking about how you wish to organise your products and services into categories and subcategories. Don't worry if you don't get it right first time though, it's easy to re-organise your product categories and subcategories later.
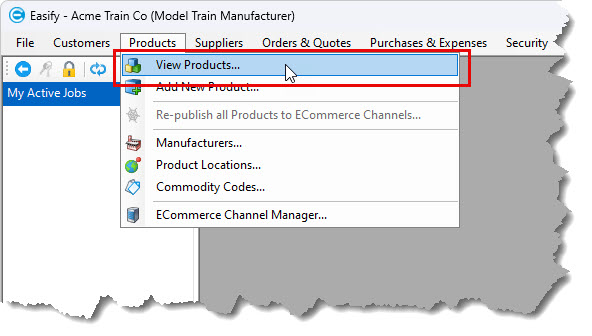
Click Products in the Easify Pro Main Menu.
Then select View Products.

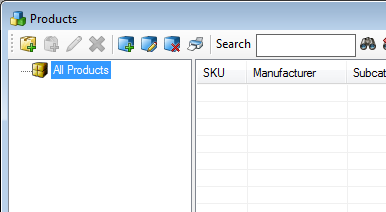
From this window you can add product categories, subcategories and product items.

Using product categories and subcategories, we can organise our products into groups so that we can easily find them later. The first step here is to create your product categories and then add in the subcategories under each category.
Click the ![]() button to add a new product category.
button to add a new product category.

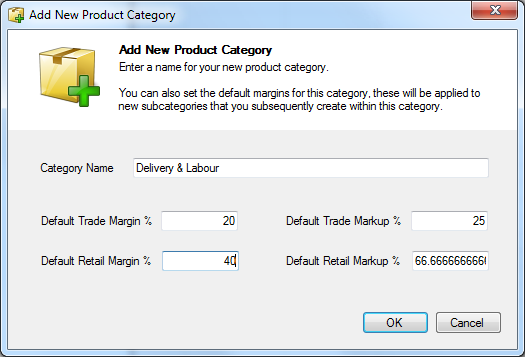
Here you can enter a name for your new category, you can also set default trade and retail margins for the category if desired.
You can enter either a margin or a markup depending on your preference, updating the margin will auto-calculate the markup and vice-versa. The default margins are used when creating subcategories of products, the newly created subcategory inheriting the default margins of the category it is created within. If you apply different margins to different categories this is a great way of always making sure you use the correct margin when creating new subcategories.
Click OK when done.
You are now returned to the products window where you will see the your product category listed under "All Products".
Repeat this step to add as many categories as you need.

Once you have the categories you require (you can always add more later), you can add subcategories.
To do this, select the category under which you wish to add your subcategory (in this case Delivery & Labour), then click the
![]() button to add your subcategory.
button to add your subcategory.

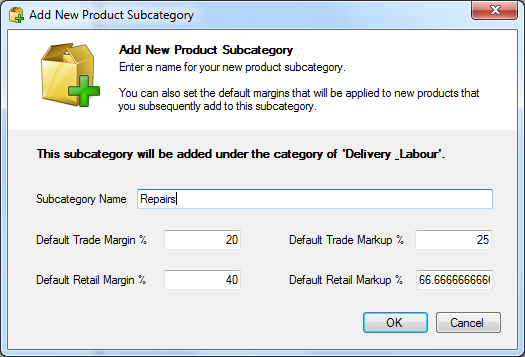
Enter a name for your new subcategory, and if desired change the default trade and retail margins for the subcategory.
Notice that the default trade and retail margins were already present when the Add New Product Subcategory window opened, these were taken from the Delivery & Labour category that we just created. You are free to change the default margins for the subcategory to whatever you like as they do not have to be the same as the default margins for category the new subcategory is in.
Default margins for subcategories are used when you create new products, a newly created product takes its initial margins from the default margins of the subcategory it is created in. Default margins are also used when you import products without margin information, the margins being taken from the default margins of the imported products subcategory.
Note: You can review and change category and subcategory default margins at any time via Easify Options. This can be found via the main menu Tools->Options->Products->Default Margins.
Click OK when done.
Continue to add more subcategories as required.
Your subcategories are not always visible. This is the case when the list of categories is being viewed in "collapsed" mode. This is easily seen as each category that has subcategories will show a Plus (+) symbol to the left of the category title.

Clicking on this Plus symbol will expand the list and show the subcategories beneath. Note that the Plus symbol has changed to a minus symbol now.

If you have followed the Initial Setup articles in sequence, you're now in good shape to start using Easify for real. Your next steps are to start entering your products - either one at a time, or by importing them from a CSV file. Once you have added some products you will be ready to start selling to your customers.
Refer to the next set of articles "Configuring Options" if you would like to see how you can further customise Easify to suit your needs, or feel free to explore the rest of the Easify online help for information about specific aspects of using Easify.

