Raising a New Order
You can raise a new order directly from the main Easify Window.
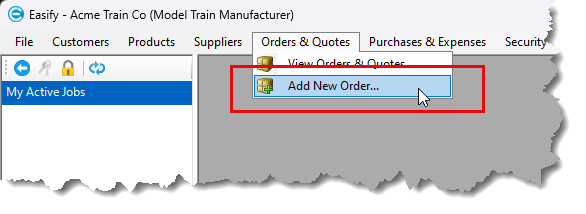
You can also raise a new order via the
Orders & Quotes
window
, by clicking the  button.
The New Order window gives you fine control over every aspect of a quote or an order.
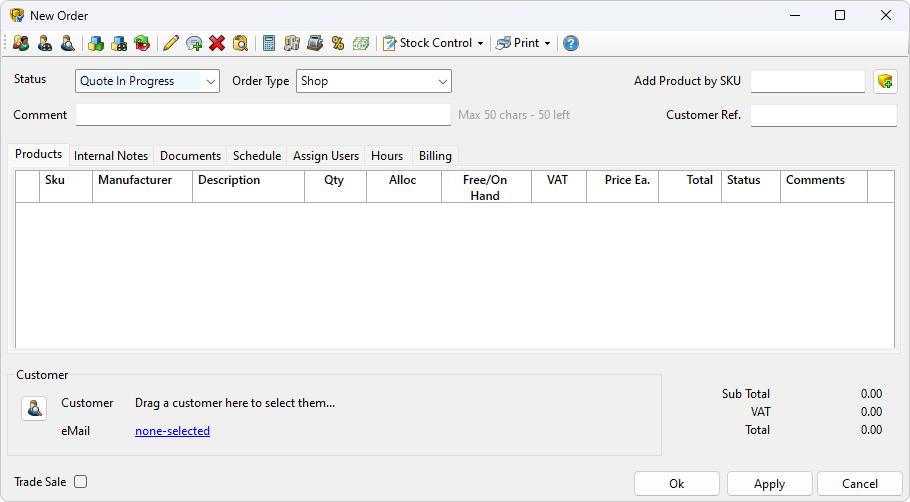
The window comprises a toolbar at the top with a selection of buttons for creating and managing orders. Beneath the toolbar is an area where you can set order information such as order status, order type and order comments.
Click here to learn more about the various toolbar buttons...
Below this is a tabbed view that gives you access to the products on the order. Details on the other tabs can be found below:
- Internal Notes
- Documents (NOTE: This tab will only be visible if the DMS is enabled under the Tools Options General tab. )
- Scheduling
- User Assignments
- Hours Logging
- Billing Information
The lower part of the window displays customer information along with the totals for the order.
Status
The Status allows you to control what stage of progress a quote or order is in.
When you first create a quote/order the status is automatically set to Quote in Progress . This is because in Easify, all orders start life as in progress Quotations. Bear in mind that in Easify, an Order is just a Quote that someone has given you the go ahead on. When the customer places an order with you, the quote becomes an order.
The Status does not change automatically, you change the status yourself as the job progresses. The initial status will be Quote in Progress, and when you have completed the quotation you can change the status to Quote Complete. When the customer goes ahead with the order, you can open the order and change its status to In Progress, or whatever is appropriate for your workflow.
Changing the status of an order as you progress it enables you to filter your orders by status in the main Orders & Quotes Window which means you can, for example, view Quotes that need to be finished, Orders that are in progress, or orders that are complete and have not yet been invoiced.
Click here to learn more about working with Order Status...
Order Type
You can set the Order Type to help you to categorise different types of order.
For example you might want to be able to tell which orders are telephone orders, which orders are internet orders, and which orders are shop sales.
When you run a sales report in Easify, the totals for the various order types will be displayed at the bottom of the sales report so that you can easily see which types of orders generated what amount of sales.
Easify comes with a list of preset Order Types, but you are free to customise this list to suit your particular business model in Easify Options.
Click here to learn more about customising Order Types...
Comments (required)
You will need to enter comments for the order in the Comments text box. These comments will act as a title for the order, and will print out on quotes, estimates and invoices before the products on the order. The comments should be something like "New computer for the main reception desk", "Site visit to install new underfloor heating controller" or "Various products collected in person" etc... The order comments also appear alongside each order in the Orders & Quotes main window so good comments will help you to quickly identify orders at a later date.
Order comments are also printed on quotations and invoices to your customers, so using a descriptive comment can help you and your client to easily see what a particular quote or invoice relates to.
Add Product by SKU
This allows you to quickly add a product to a quote/order by typing in its SKU (Stock Keeping Unit or Stock code) and pressing Enter or clicking the adjacent add button. You can also use a barcode scanner to scan a stock code directly into this box.
See the Products section below for more information about adding products to a quote/order.
Customer Ref.
This text box allows you to enter your customers reference number. Typically this would be your customers purchase order number.
The value that you enter here is searchable from the main Orders & Quotes Window. So if your customer gave you a purchase order number and you entered it in the Customer Ref. box, at a later date you could search for the customers purchase order number from the main Orders & Quotes Window to easily find the order that they are referring to.
You can also add the Customer Ref. to your paperwork (quotes, invoices etc...) using the Easify Paperwork Designer.
Click here to learn more about the Easify Paperwork Designer...
Adding Products to a Quote or Order
A new order will require products. Adding products to your order is as easy as opening the Products window, finding the product you want and dragging it onto the order. (There are also other ways of adding a product to an order which we will discuss in due course).
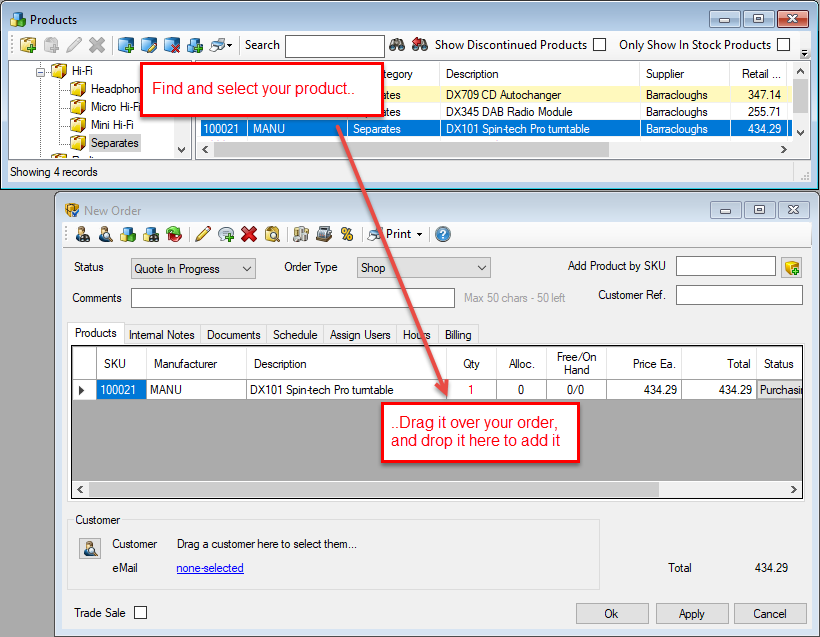
You may continue to add as many products as you wish by dragging them and dropping them onto your order.
For products that you regularly use you can enter them by their SKU. Simply type the SKU of a product into the Add Product by SKU text box and press the enter key. The product will be added to the order.
Easify also features a product picker that lets you search for products from within an order. Click the Search for Product button or press the F3 key to bring up the product picker.

Type in the description or SKU of the product you are looking for and the list of product in the product picker window will be narrowed down to match your search text. When you find the product you are looking for, select it and click the OK button (or press Enter). The selected product will be added to your order.
Click here to learn more about working with products on quotes and orders...
Assigning a Customer to a Quote or Order
You will need to select a customer for your order. Again, this is as easy as dragging and dropping a customer onto the order...
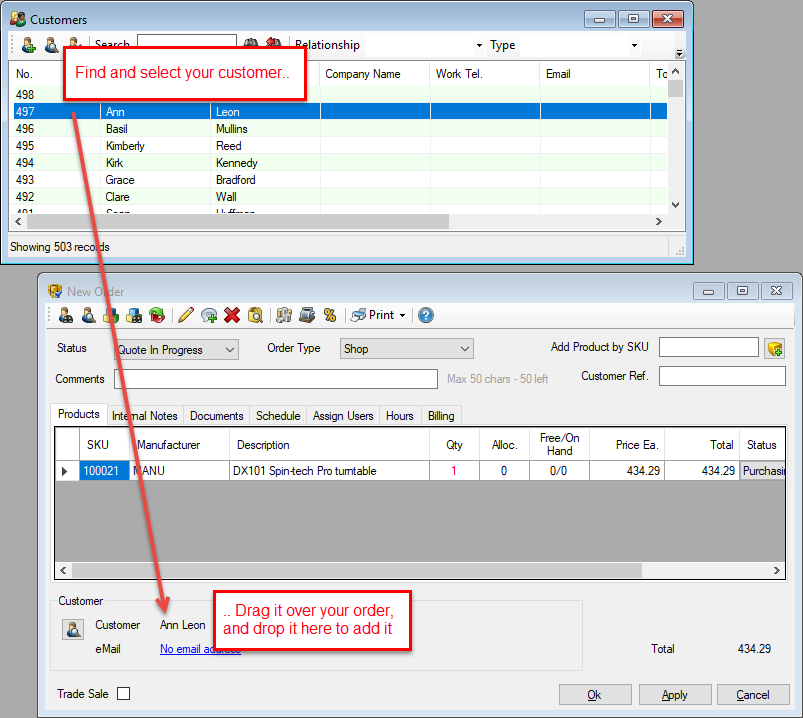
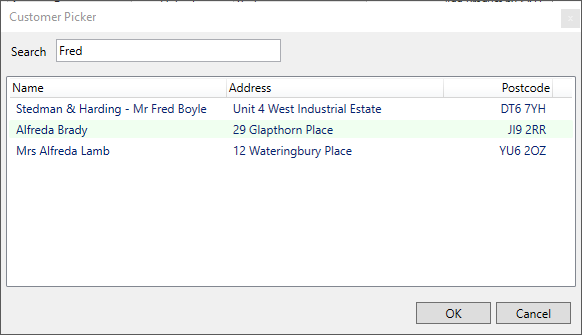
Alternatively you can use the customer picker to find a customer and assign them to your order.
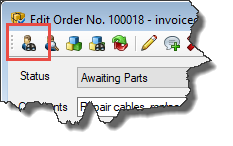
Click the Customer Picker button (or press the F5 key)...
Search for and select the customer you want to assign, and click the OK button to assign them to the quote/order.
Trade Sale
If you tick the Trade Sale box, the products on your order will be sold at your trade price. Unticking the box will cause your products to be sold at their retail price.


