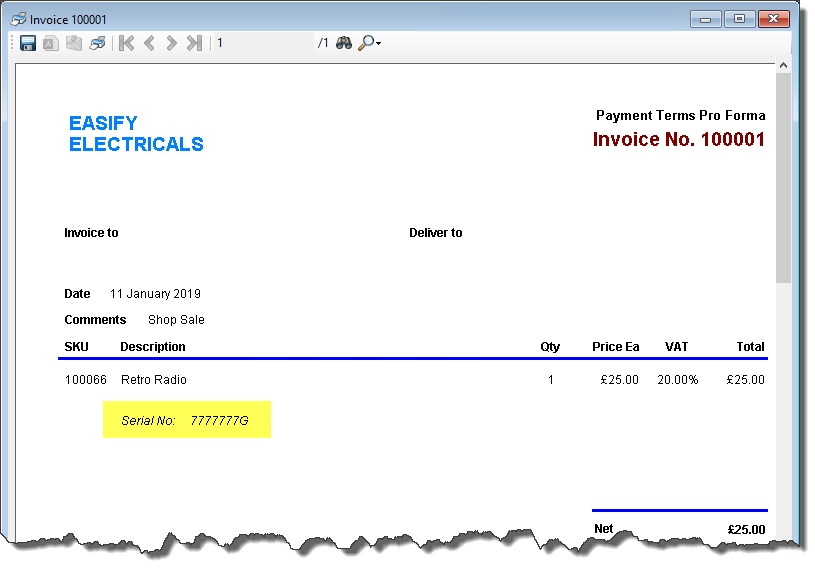
Working with Serial Numbers
The purpose of this article is to demonstrate how you can record serial numbers in Easify and use them to track products.
This guide walks you through the following steps:
- Enable Serial Numbers in Easify
- Record Serial Numbers of products on a Purchase Order
- Record Serial Numbers of products on a Customer Order
- Record Serial Numbers of products on the POS
- Search Purchases using a Serial Number
- Search Orders & Quotes using a Serial Number
- Display Serial Numbers on a Document using Paperwork Designer
Enable Serial Numbers in Easify
In order to start using serial numbers in Easify you need to enable the Serial Numbers Column.
1: Go to Tools Options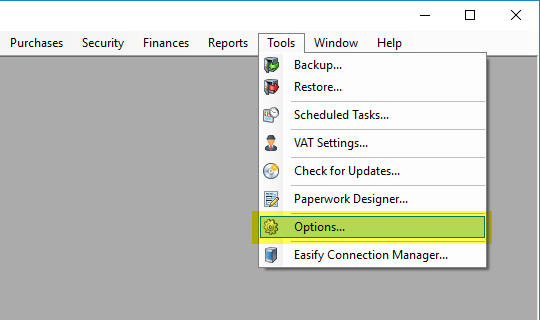
2: Navigate to Orders & Quotes Advanced Tab
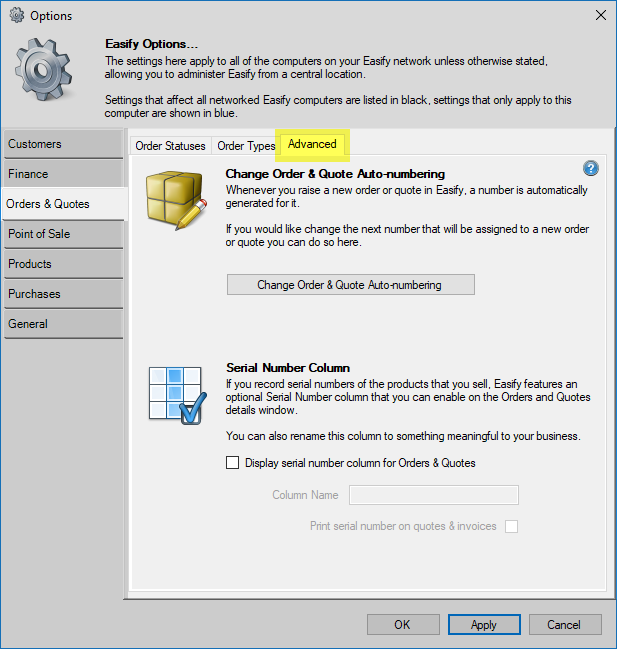
3: Put a tick in the box next to “Display serial number column for Orders & Quotes”
- In the screenshot below, I have also entered “Serial No.” in to the Column Name field so I can identify it later on. You are free to choose your own Column Name.
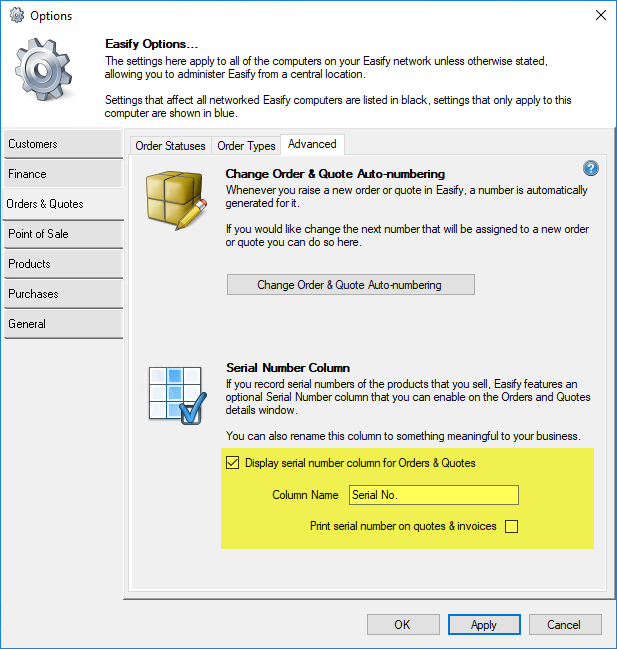
4: Click OK to save changes
Record Serial Numbers of Products on a Purchase Order
1: Raise a new Purchase and add a product- In the screenshot below, I have raised a new Purchase for some "Retro Radios" and entered a quantity of 10.
- See our support article Raising A New Purchase if you need help with this step.
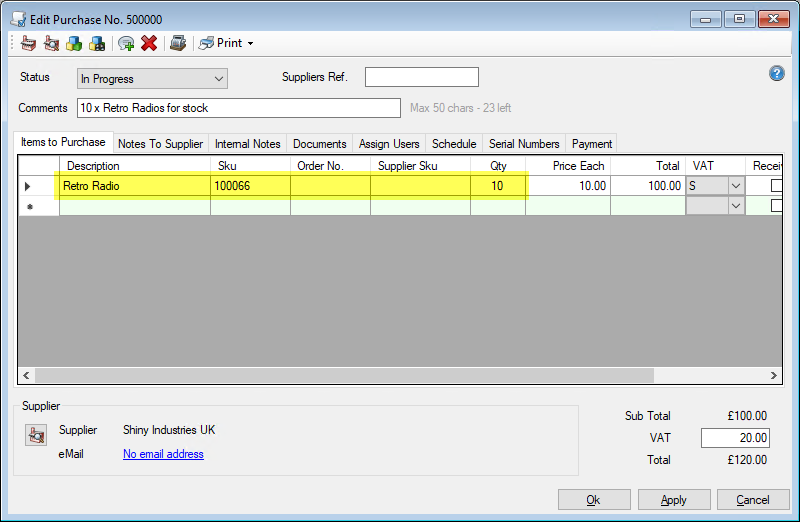
2: Click on the Serial Numbers tab and enter the serial numbers for each of the 10 products
- Each number needs to be entered on a separate line.
- Click inside the box and use a barcode scanner to scan in the numbers, or manually type them out.
- Barcode scanners are available from our online shop.
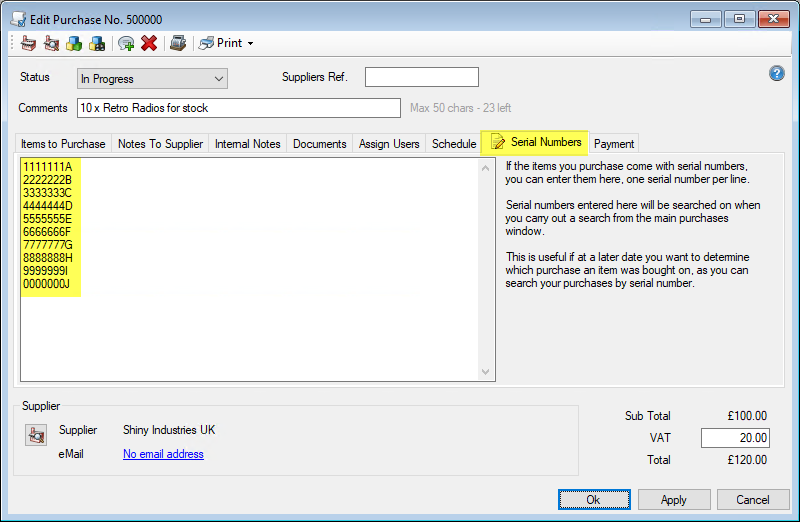
3: Click OK to save changes
Record Serial Numbers of Products on a Customer Order
1: Create a new customer Order and add a product
- In the screenshot below, I have created a customer Order and added 1 x "Retro Radio".
- See our support article Raising A New Order if you need help with this step.
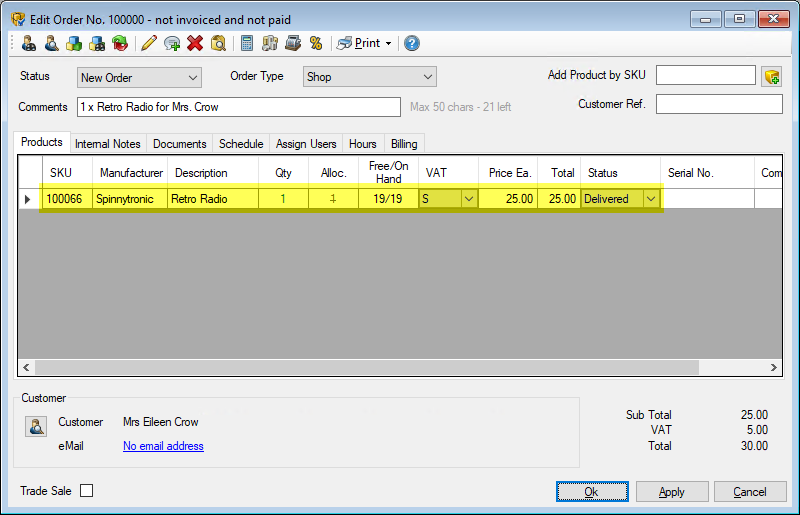
2: Enter the serial number for the product in the Serial Numbers Column
- Click inside the box and use a barcode scanner to scan in the number, or manually type it out.
- Barcode scanners are available from our online shop.
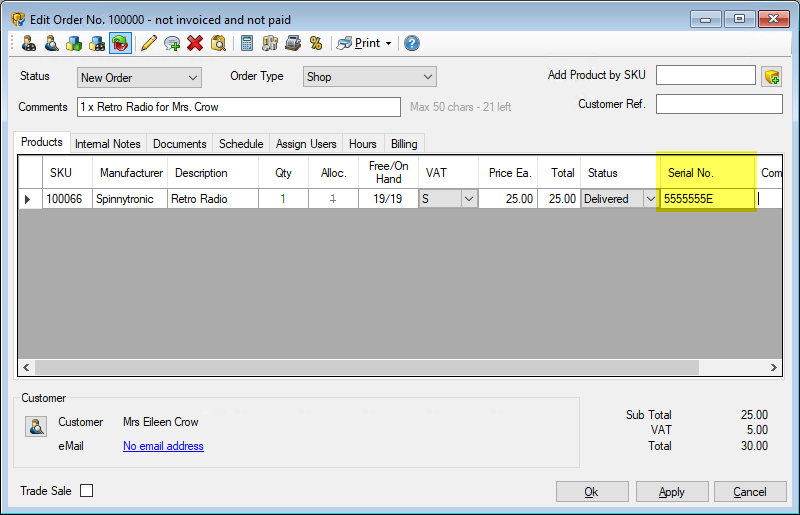
3: Click OK to save changes
Record Serial Numbers of Products on the POS
1: Open the POS and add a product
- In the screenshot below, I have added 1 x "Retro Radio".
- See our support article EPOS: Raising A Sale if you need help with this step.
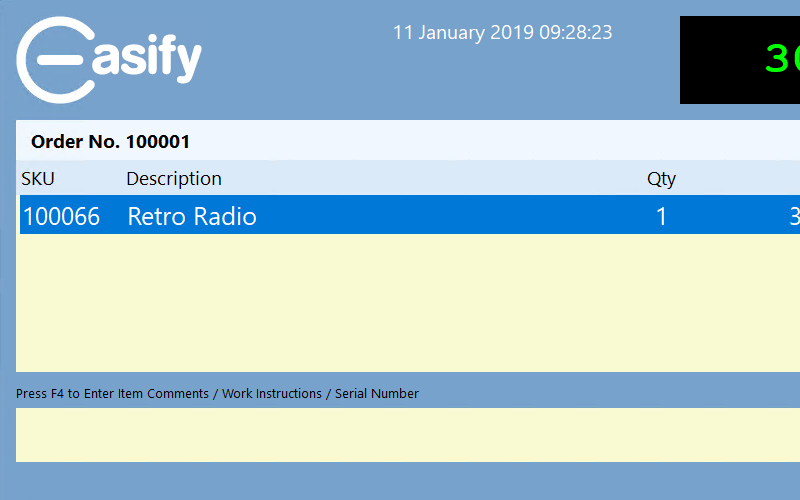
2: Press F4 to open the Edit Comments window
- Alternatively, click on the F4 icon on the bottow row of icons on the POS.
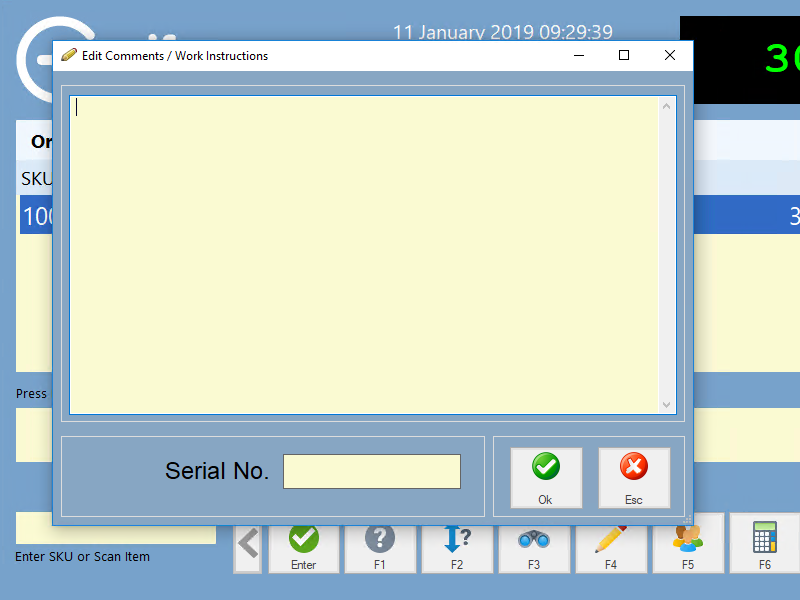
3: Scan or type a serial number in to the serial number box
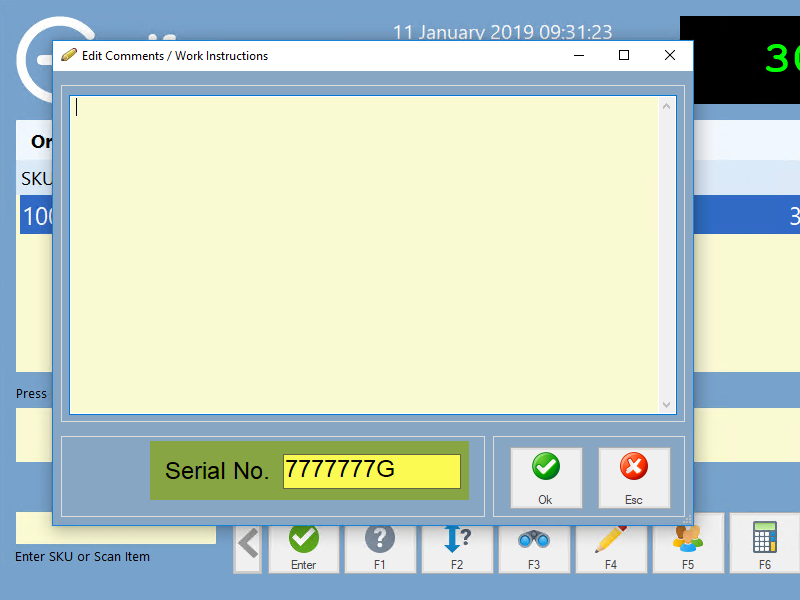
4: Click OK to save changes
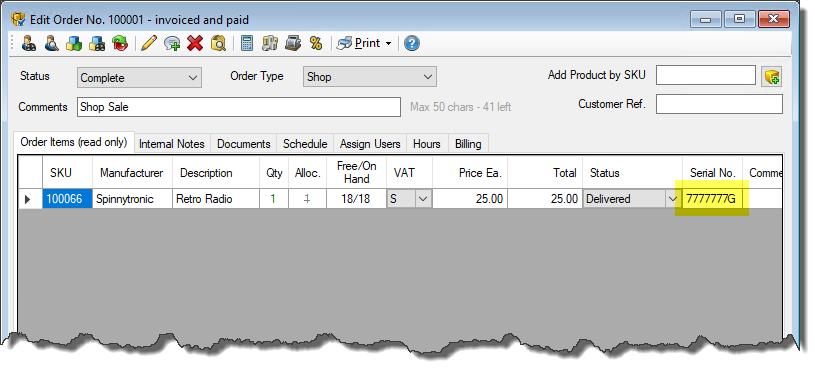
- If you now take payment on the POS, the serial number is automatically recorded on the Order that was generated for this sale (see screenshot).
Search Purchases using a Serial Number
Open the Purchases window and enter a serial number in to the Search field
- The search result displays the Purchase on which the serial number was originally recorded.

Search Orders & Quotes using a Serial Number
Open the Orders & Quotes window and enter a serial number in to the Search field
- The search result displays the Order on which the serial number was originally recorded.
- If you don't see the Order, make sure you have set the Status to blank on this window in order to show completed orders as well.

Display Serial Numbers on a Document using Paperwork Designer
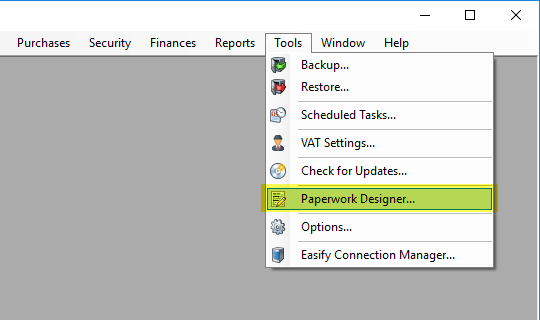
1: Open Paperwork Designer
- Please click here for a detailed guide on how to use the Paperwork Designer.
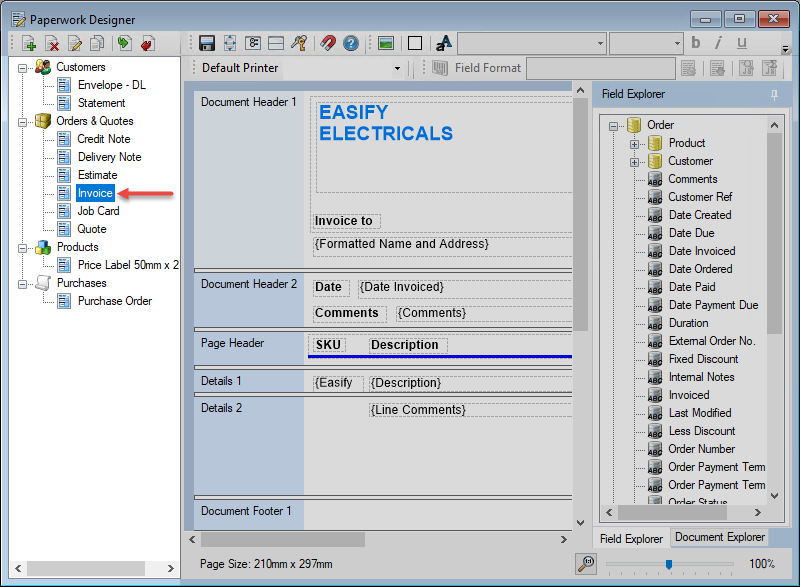
2: Select the Document you would like to edit
- The Document must be from the Order & Quotes category.
- In the screenshot below, I have selected the Invoice Document.
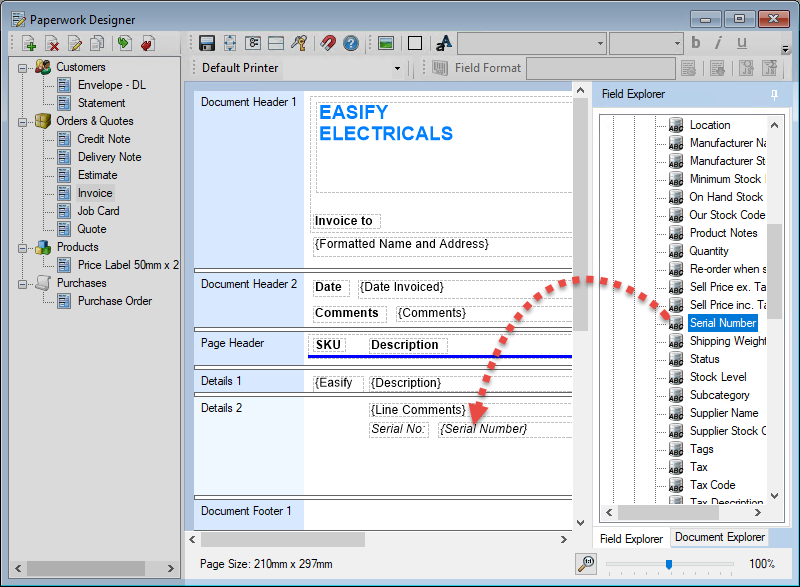
3: Drag and drop the Serial Number field into the Document layout
- You can find the Serial Number field in the Field Explorer on the right hand side by expanding the Order Product category.
- For clarity, I have also added a text box on the Document layout next to where I have added the field. The text says "Serial No:".
4: Click the Save icon

5: Open an Order and print an Invoice
- If an Order has serial numbers recorded on it, they will now show on the Invoice.
