Paperwork Designer Overview
The Paperwork Designer that is built into Easify allows you to create and edit public facing documents for your business such as Invoices, Quotations, Purchase Orders, Price Labels, Delivery Notes etc...
The Paperwork Designer features an intuitive WYSIWYG (What You See Is What You Get) interface that allows you to simply drag and drop the various elements that will make up your document (Pictures, Text, Lines and Data) onto your document.
Because the document that you create are stored in the Easify database, any documents that you create will be instantly available to all Easify users on your network meaning that you do not have to manually copy changes to each individual computer.
Each document that you create can be assigned to print menus of your choice within Easify, so for example if you wanted to create a customer address label that is printable from the Order Details Window, you can achieve this with the paperwork designer. You would create the address label, and assign it to be printable from the Order Details Window.
You can lock down the security on each document too, choose which Easify users are allowed to print the document and which aren't. For instance you might want to limit who is allowed to print a Customer Statement, or perhaps you need to limit who is allowed to print invoices.
To launch the label designer click the Tools->Paperwork Designer menu in the Easify main window.

The main areas of the Paperwork Designer are highlighted below...

Document Browser
The document browser shows you a list of all the paperwork (documents) that have been created in Easify. Here you can select a document to edit, create a new document or create a copy of a document. You can also rename and delete documents here.
From here you can also export and import your documents. Exporting a document saves it do disk at a location of your choice, this is useful if you want to create a backup of a document before editing it. Importing a document loads it from disk, this comes in useful when you want to restore a document from disk.
Loading an existing document
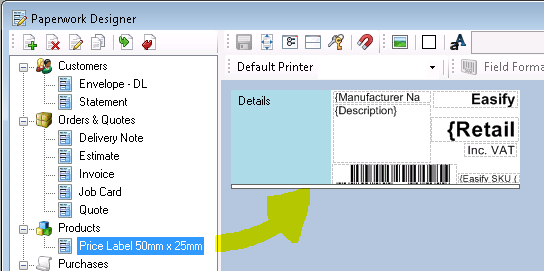
You can load any of your existing documents into the Document Designer by simply clicking the desired document in the Document Browser. The selected document will be loaded into the Document Designer where it can be edited.
Creating a new document
Create a new document by clicking the Add New Button in the Document Browser.
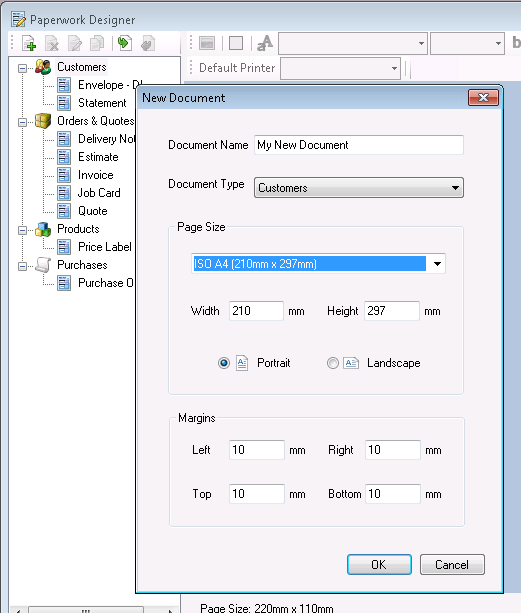
Enter a name for the document in the Document Name text box.
Document Type will already have been filled in for you depending on which type of document you had selected in the Document Browser. Feel free to change this value to suit the type of document that you want to create.
You can set the page size by choosing from the drop down list of pre-set page sizes. Alternatively you can set the dimensions of the document by entering the desired Width and Height (in millimetres).
Choose whether you want a portrait or landscape orientation for your document.
Finally you can specify margins for your document. These default to 10mm which is usually fine for A4 or Letter sized documents, but for smaller documents such as price labels you will probably want to reduce the margins to be smaller.
Deleting a document
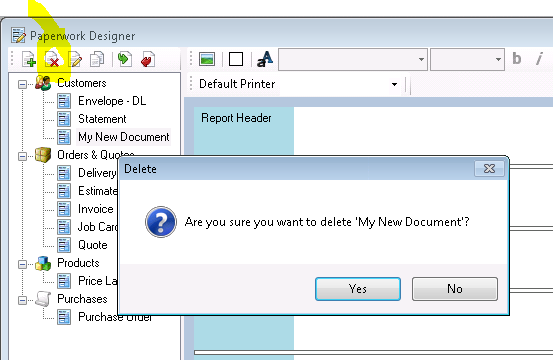
To delete a document, click it to select it in the Document Browser. Click the Delete button and when asked whether you really want to delete the document click the [Yes] button.
Renaming a document
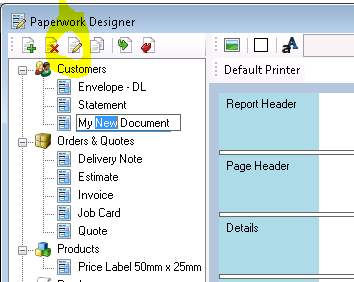
To rename a document, click it to select it in the Document Browser. Click the Rename button. The document name will become editable in the Document Browser allowing you to type in a new document name. When you have finished editing the document name, press the Enter key on your keyboard to finish.
Copying a document
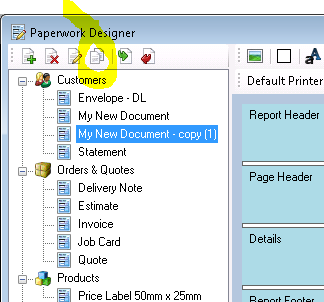
To create a copy of a document, click it to select it in the Document Browser. Click the Create Copy button. A copy of the document will appear in the Document Browser.
Exporting a document
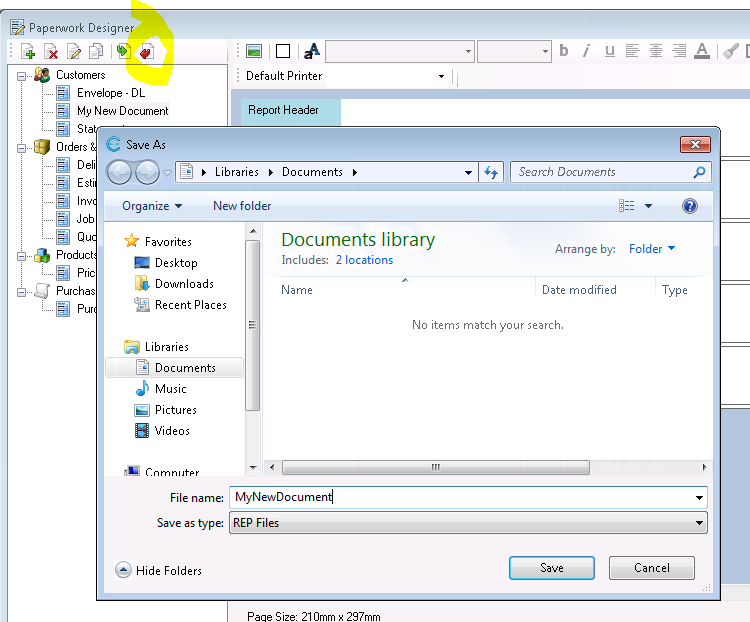
To export a document to file, click it to select it in the Document Browser. Click the Export selected document to file button.
The Save As dialogue will appear, simply choose a location to save the exported document, enter a name for it and click the Save button.
Importing a document
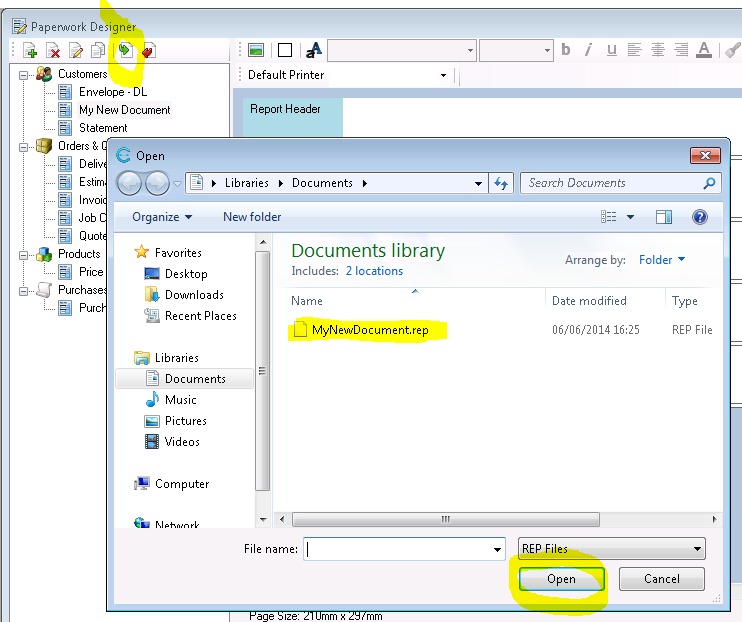
To import a document from file, click the Import document from file button.
The Open dialogue will appear. Browse to the document file that you wish to open, select it and click the Open button.
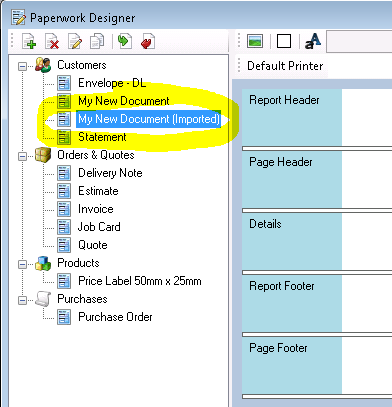
The document will be imported and will appear in the Document Browser.
Document Designer
The document designer is where you place all of the elements that you want in your document such as static text, images, boxes and lines and merged text fields (Mergefields) containing data that has been merged from the Easify database.
The Document Designer is divided horizontally into various Sections, these sections are used to divide the document into headers, details and footers. Sections allow you to have your company logo appear on only the top of the first page of a document, or for an order total to appear only on the last page of a document etc... Click here for more information about Working with Sections.
The document designer is WYSIWYG (What you see is what you get) allowing you to drag the document elements into the position that you want them. For static text you can type the text directly into the document designer, and images can be dragged to the size and shape you want them.
As well as being able to position and resize document elements such as pictures and text fields within the document designer, you can also right click document elements to bring up a context menu that allows you to move the item on top or behind other items, you can also rename and delete document elements. See the later sections Field Explorer and Document Explorer for more information about the context menu as used for editing document elements.
For more information on using the Document Designer see subsequent sections:
- Working with Text
- Working with Pictures
- Working with Boxes and Lines
- Working with Data
- Working with Sections
Toolbars
The toolbars area contains the tools you will need while creating and editing your documents. Here you can add text and pictures to your documents, choose the font and font size for text, set text formatting etc...
When no document is loaded in the Document Designer the controls in the toolbars will be disabled (greyed out). When you load a document and start editing it, the controls will become available as they become relevant to what you are doing.
Click here for more information about the Document Designer Toolbars.
Field Explorer
When you create or edit a document using the Paperwork Designer you can add data fields to the document such as product prices, customer details, order totals etc...
These data items are known as Mergefields and are accessible via the Field Explorer.
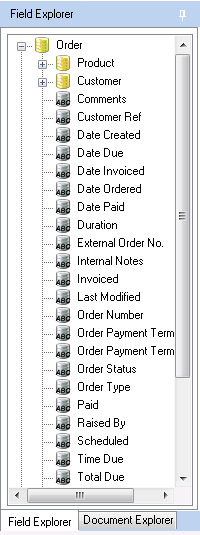
The list of Mergefields that you can see will depend on which type of document you are working on. For a Customer document you will see Mergefields related to customer records, for a Purchase document you will see Purchase related Mergefields.
To add a Mergefield to your document you simply drag it from the Field Explorer and drop it onto your document.
Document Explorer
The Document Explorer shows you a list of all of the pictures, static text, boxes and MergeFields that are present in your document.
Selecting a document element in the Document Designer will select it in the Document Explorer.
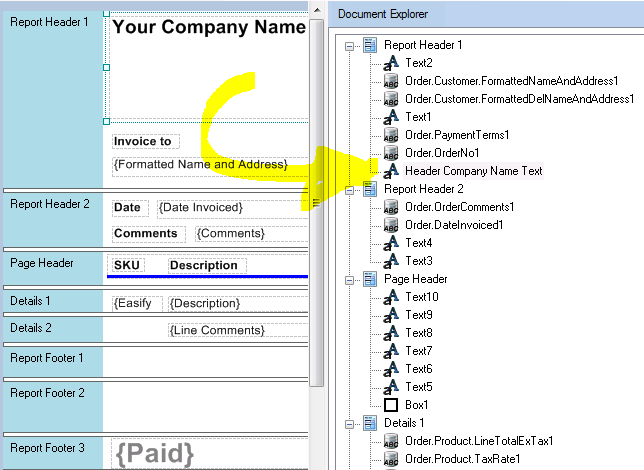
Right clicking an item in the Document Explorer will bring up a context menu that allows you to manipulate items in the document.
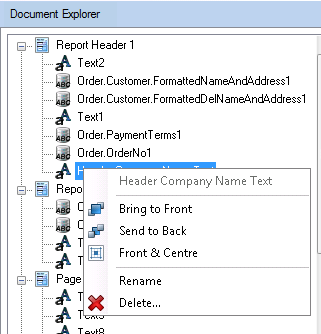
The first item at the top of the menu is greyed out, and is the name of the picture or text field.
Bring to Front: This brings the selected picture or text field to the front of the document putting it on top of all other pictures or text fields. Note that this also moves the item to the top of the list in the Document Explorer, items in the Document Explorer are listed in order from front to back (also known as their Z order).
Send to Back: This sends the selected picture or text field to the back of the document putting it behind all other pictures or text fields. Note that this also moves the item to the bottom of the list in the Document Explorer, items in the Document Explorer are listed in order from front to back (also known as their Z order).
Front & Centre: This handy command will cause the selected picture or text field to be placed on top of all other items, and also to be positioned in the centre of the document section. This is useful when you have a complex document with many items on it and you have lost track of where a particular item is, also for when an item has become positioned outside the viewable area of the document as can happen when you reduce the page size of a document.
Rename: This command allows you to rename the document item. It is a good habit to label the items on a document to describe what they are to help you when you are editing the document.
Delete: This allows you to delete the selected picture or text field from the document.
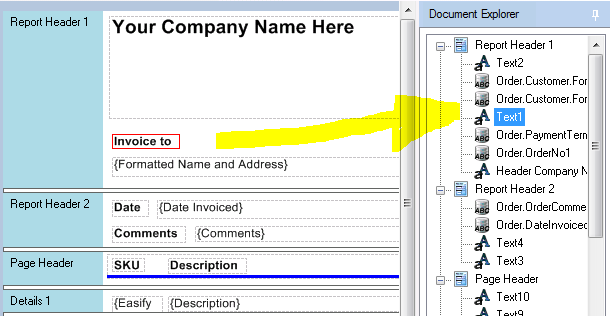
When you select an item in the Document Explorer by clicking it, the corresponding picture or text field will be outlined in red in the Document Designer. This is a handy way of identifying which field is which.
Document Designer Zoomer
The Document Designer Zoomer allows you to zoom the Document Designer in and out in order to help you with fine positioning of document elements.

