Moving Easify Server to another computer
Overview
You might wish to move your Easify Server if you have bought a new computer for the Easify Server to run on, or if you installed Easify on a laptop and now want it moved to a fixed PC or Server.
Moving your Easify Server involves the following steps:
- Upgrade Easify on the original computer to the latest version.
- Backup Easify Server on the original computer.
- Stop the Easify Server on the original computer.
- Install Easify using the same company name and description on the destination computer.
- Copy the backup file created in step 1 to the destination computer.
- Restore the backup on the destination computer.
- Uninstall the Easify Server license on the original computer.
- Install the Easify Server license on the destination computer.
- Authorise the restored Easify Server for local and/or remote connections.
- Uninstall Easify Server from the original computer.
Step 1. Upgrading Easify on the original computer...
To ensure a smooth migration to the new computer, we recommend that you upgrade Easify to the latest version before you start the migration process. If you know that you are already running the latest version you can skip this step.
If you are unsure as to whether you have the latest version of Easify installed, just run the upgrade anyway - it won't break anything.
You can download the latest version of Easify here, and follow this guide on upgrading Easify V4.
Step 2. Backup Easify on the original computer...
Launch Easify, log into your Easify Server and from the main Easify Menu select Tools -> Backup.
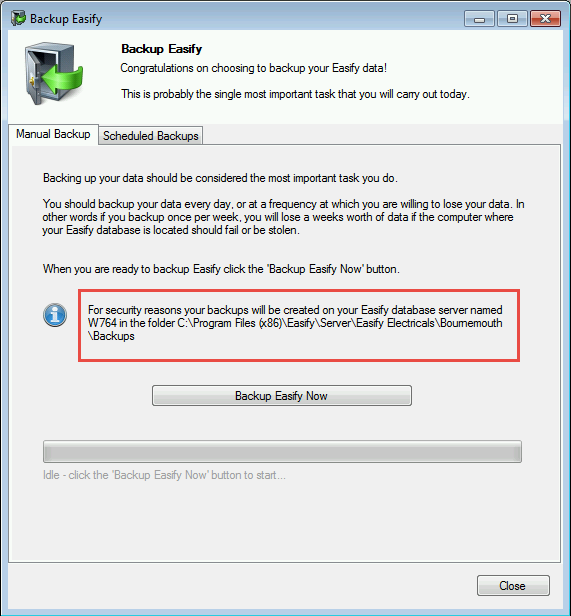
The Easify Backup dialogue will appear, and in the area outlined in red in the picture above you will see the path to which the backup will be saved.
Be aware that the backup file will not be on your computer if you are accessing the Easify Server via a network, for simplicity we recommend that you carry out the backup on the original computer itself, and not on a networked client computer. The information outlined in red above contains the name of the computer on which the backup will be saved which will help you determine where the backup will be saved.
Click the Backup Easify Now button to backup your Easify Server.
Open the folder location as outlined in red above (you can drag select the file path in the Backup Easify dialogue), and copy the backup file that was created to a USB stick, cloud storage folder (i.e. DropBox) or to a network share where you will be able to access the backup file on the new computer later.
Step 3. Stop the Easify Server on the original computer...
On the original computer launch the Easify Server Manager application.
Click here for more information about how to launch Easify Server Manager.
In the Easify Server Manager, select your Easify Server and click the Stop button.
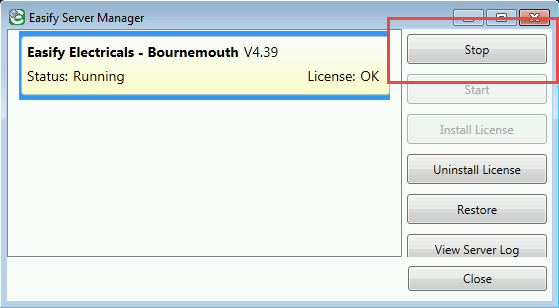
This ensures that no-one will connect to and use the original Easify Server while you are moving it to the new computer.
While you have the Easify Server Manager open, make a note of the Company Name and Description - you will need these in the next step.
Your Company Name and Description are shown in bold font in the Easify Server Manager and are separated by a hyphen, so in the example above the Company Name is Easify Electricals and the Company Description is Bournemouth.
Step 4. Install Easify on the destination computer...
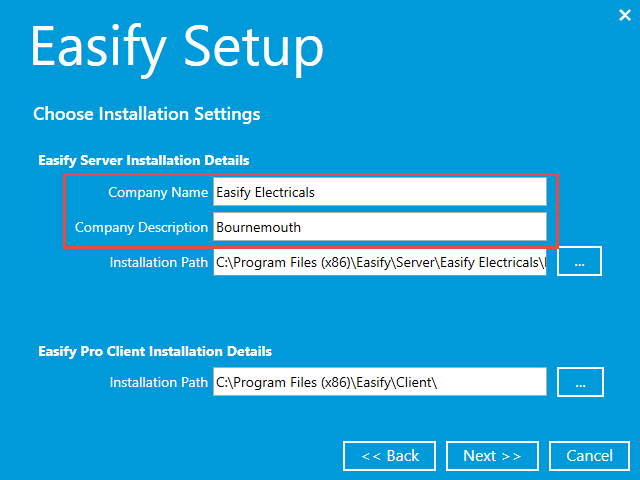
On the destination computer run Easify Setup and install Easify with the same Company Name and Description as the original Easify Server you are moving. (You will have obtained these values in the previous step.)
Click here for more information about installing Easify.
The image below shows Easify setup where we have entered the Company Name and Description as obtained in the example in Step.3.
Step 5. Copy the backup file created in Step 1 to the destination computer...
First you will need to know where the backup directory on the new computer is.
Launch Easify Pro on the destination computer, and select Tools -> Backup from the main menu.
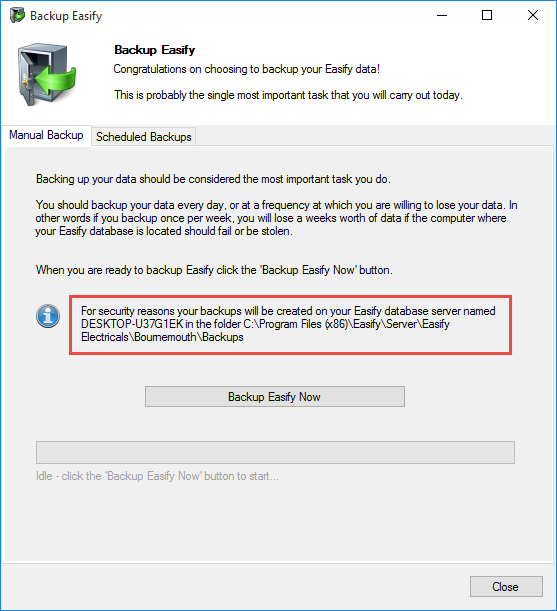
Open the folder location as outlined in red above (you can drag select the file path in the Backup Easify dialogue), and copy the backup file that you previously saved in Step 2 to this folder.
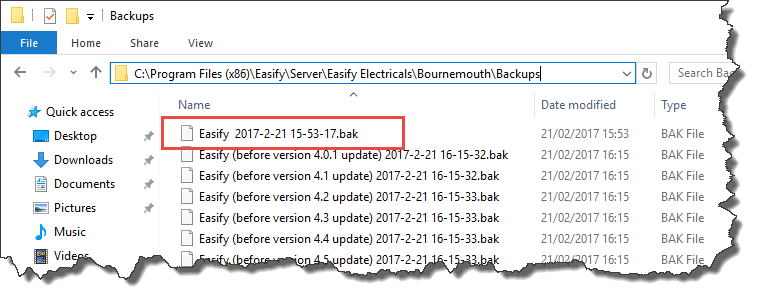
Now close Easify Pro.
Step 6. Restore the backup on the destination computer...
On the destination computer launch the Easify Server Manager application.
Click here for more information about how to launch Easify Server Manager.
In the Easify Server Manager, select your Easify Server and click the Restore button.
You will receive a notification that you are about to restore your Easify Server - Click OK.
Next you will get to choose which backup file you want to restore from.
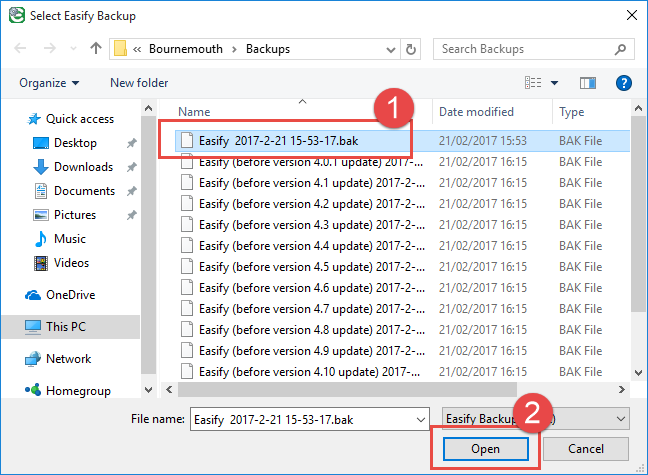
Select the backup file that you copied over in Step.5 and click Open.
You will receive a final dialogue box warning you that you are about to overwrite your Easify database, double check that you have selected the correct backup file and click OK to begin the restore process.
Wait until the restore operation completes, at which point you will receive a notification that the Restore completed OK.
Click OK and close the Easify Server Manager.
Step 7. Uninstall the Easify Server license on the original computer...
In order to license the Easify Server on the new computer you will need to uninstall the Easify Server License on the original computer.
On the original computer launch the Easify Server Manager application.
Click here for more information about how to launch Easify Server Manager.
In the Easify Server Manager, select your Easify Server. Notice that the Uninstall License button is disabled and the license status is showing as unknown. This is because we stopped the Easify Server in Step.3 in order to prevent people inadvertently using it.
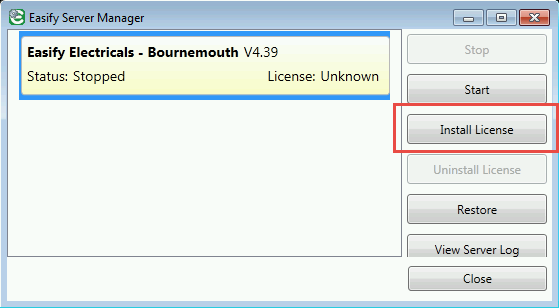
This is not a problem, simply click the Install License button instead, this will bring up the Easify Licensing Dialogue...
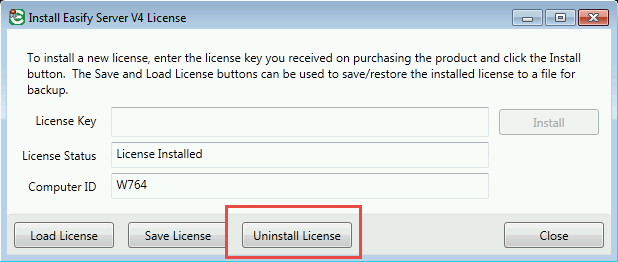
In the Install Easify Server License dialogue, click the Uninstall License button, and click OK when prompted.
After several seconds, the Easify Server License dialogue should show that the license has been uninstalled.
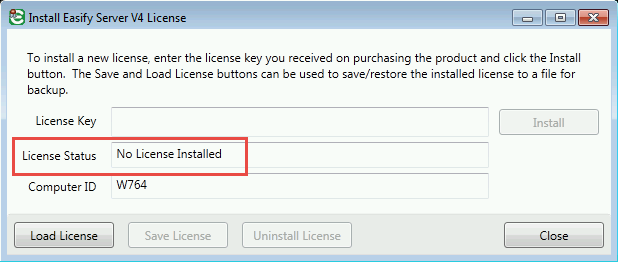
Click Close to close the Easify Server License dialogue.
Close the Easify Server Manager.
Step 8. Install the Easify Server license on the destination computer...
Now that you have de-activated your Easify Server license, you can install it on the destination computer.
On the destination computer launch the Easify Server Manager application.
Click here for more information about how to launch Easify Server Manager.
In the Easify Server Manager, select your Easify Server and click the Install License button.
In the Install Easify Server License dialogue, enter your Easify Server product key, and click the Install License button. Click OK when prompted.
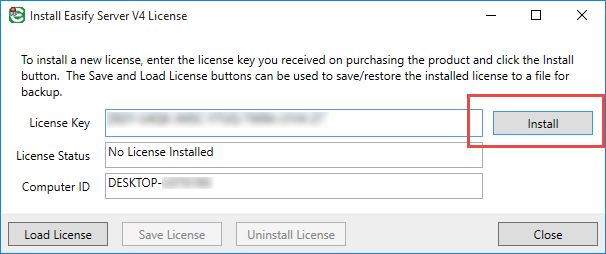
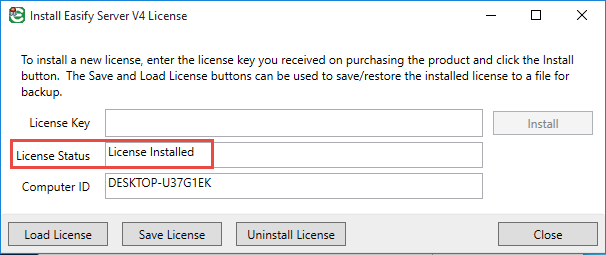
After a few seconds, the license will install.
Step 9. Authorise the restored Easify Server for local and/or remote connections...
Because your Easify Server has been moved to a new computer, as a security measure you will need to re-authorise it for local and/or remote connections.
Launch Easify Pro on the destination computer and from the main menu select Tools -> Easify Connection Manager
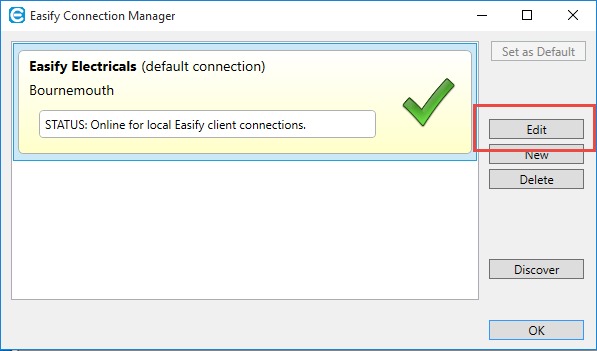
In the Easify Connection Manager, select your Easify Server and click the Edit button.
The Easify Server Move Wizard will appear, telling you that it has detected that the Easify Server has been moved.
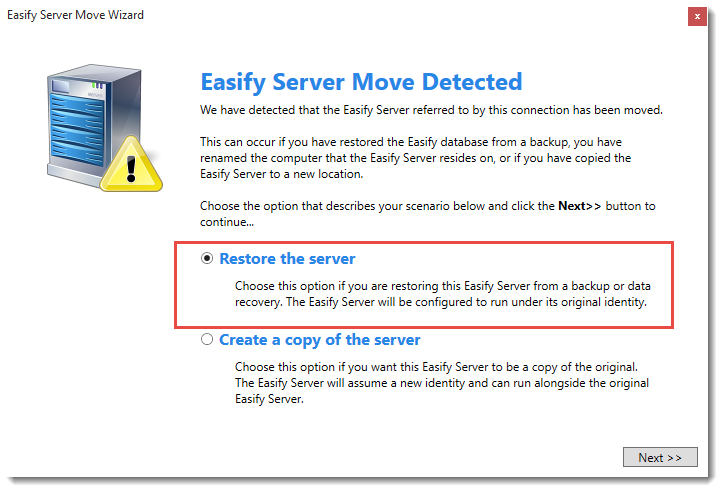
In this case we have restored the Easify Server from a backup, so select the Restore option and click Next.
The next page of the Wizard will ask you whether you want to enable the Easify Server for local and/or remote connections.
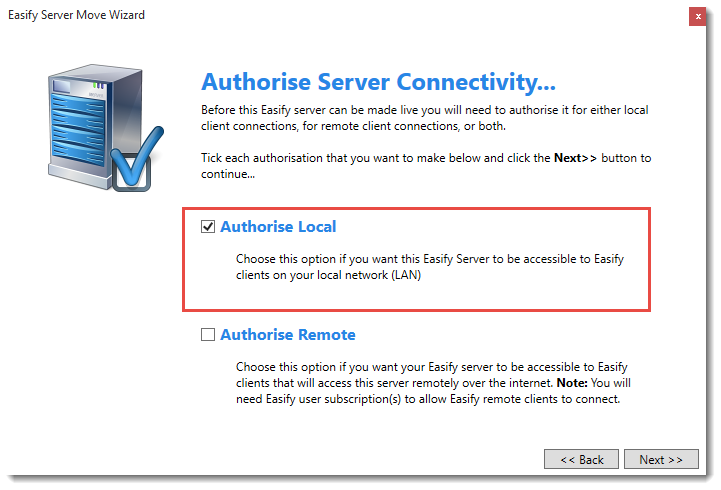
For nearly all cases you will want to select Authorise Local as this allows Easify Pro to communicate with the Easify Server on your local network (LAN). If you use Easify Server via the internet using an Easify Pro User Subscription, or if you use eCommerce with your Easify Server, you would also need to select Authorise Remote so that Easify is authorised to communicate with remote clients.
In this example we only use Easify Server on the local network so we select Authorise Local and click Next.
On the final page of the Wizard click Finished.
The Easify Server Editor will appear, you can close this Window by clicking OK.
Step 10. Uninstall Easify Server from the original computer...
To prevent you ending up with two Easify Servers on your network, you will need to uninstall the Easify Server from the original computer.
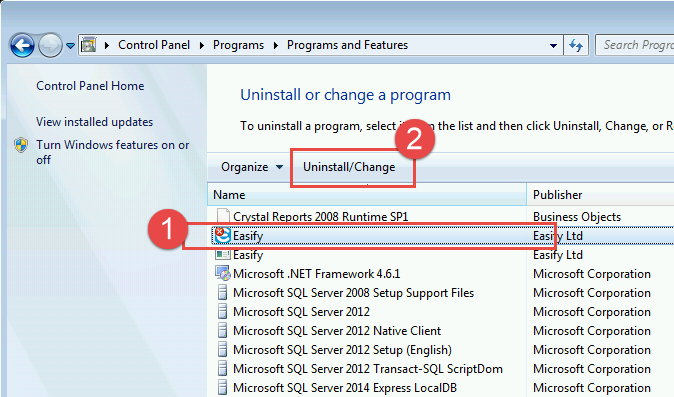
Go to the Windows Control Panel on the original computer and find the Uninstall a Program option.
Select Easify in the list of programs to uninstall and click the Uninstall/Change button.
In the Uninstall Easify Dialogue, select your Easify Server, and click the Uninstall Selected Components button.
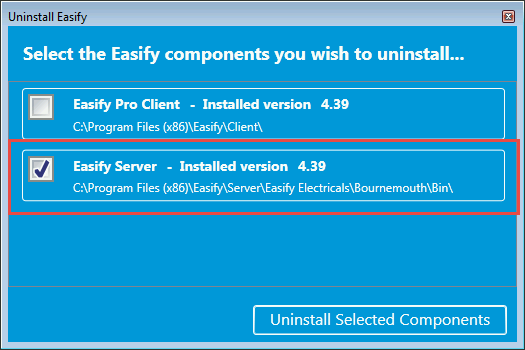
Easify Server will be removed from the original computer.
At this point you are finished and your Easify Server has been moved from the original computer to the destination computer.

