Paperwork Designer - Formula Editor
Formulas (formulae if you like) are a very powerful feature of the Easify Paperwork Designer that allow you to write your own code to be executed within a document to give you fine control of how the document will print or behave.
Before you read on, please understand that Formulas are an advanced subject and require good knowledge of developing software using JavaScript. For this reason we are unable to offer free support to assist with creating or editing formulas and any support requests related to Formulas must be directed to the Easify Support Forums for community support.
Ok, if you survived the above disclaimer then may I wish you a very warm welcome to the subject of Working with Formulas.
Formulas in the Paperwork Designer are written in JavaScript. We're not going to attempt to teach you JavaScript here as it would be outside the scope of this guide, and there are plenty of good tutorials out there on the web.
Any formulas that you have in your document get executed just before your document is printed. They can be used to carry out checks prior to printing and pop up prompts to the user, they can be used to hide parts of the document based on certain criteria, or they can be used to generate values for Mergefields.
There are currently three types of Formula that you can use in your documents:
Hide Formula
Hide Formulas can be created/edited by selecting the mergefield that you want to create the formula for and clicking the Hide Formula button in the Paperwork Designer toolbar.
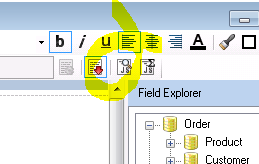
Hide Formulas are evaluated before the document is printed and if the return result from the formula is True then the mergefield will be hidden.
For example, if your hide formula (in an Orders & Quotes type document) consisted of the following line of code:
return ({General.VatRegistered} != true);
The mergefield would be hidden if you were not registered for VAT (or Tax)..
Value Formula
Value Formulas can be created/edited by selecting the mergefield that you want to create the formula for and clicking the Value Formula button in the Paperwork Designer toolbar.
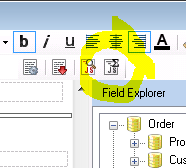
Value Formulas are evaluated before the document is printed and the value of the mergefield that they are associated with will be replaced by the return value of the formula.
For example, if your value formula (in an Orders & Quotes type document) consisted of the following line of code:
return ({Order.Product.Weight} * {Order.Product.Quantity});
The mergefield value would be the total weight of the products for that line.
Pre-print Prompt Formula
Pre-print Prompt Formulas can be created/edited via the Menu Editor. To launch the Menu Editor first load the document that you want to work on, then click the Menu Editor button in the Paperwork Designer toolbar.
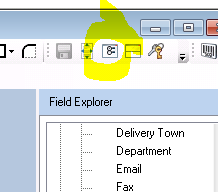
And in the Menu Editor click the Prompt before printing button on the relevant menu.
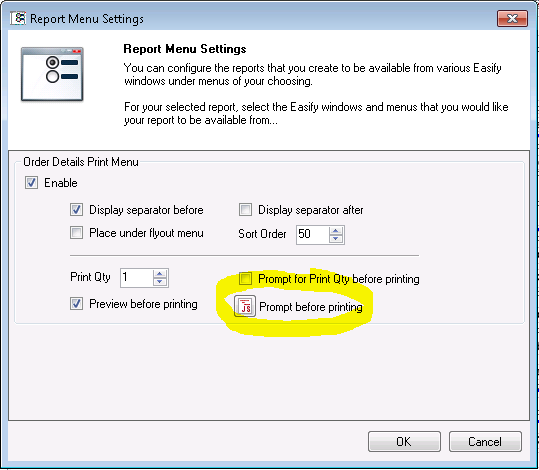
Pre-print Prompt Formulas are evaluated before the document is printed and the return value of the formula will determine whether the document is printed or not.
If the return value is an empty string then the document will be printed as normal and nothing additional will occur.
If the return value is a string value that starts with the string "[WARNING]" without the quotes, then the returned string is displayed to the user (minus the [WARNING] string) in a pop up message with an OK button. When the user clicks OK the document is printed as normal. This provides a way to warn the user based on a condition without stopping the print job.
If the return value is a string value that starts with the string "[QUESTION]" without the quotes, then the returned string is displayed to the user (minus the [QUESTION] string) in a pop up message with Yes and No buttons. If the user clicks Yes the document is printed as normal. If the user clicks No then the document is not printed. This provides a way to detect a certain condition and ask the user what to do.
If the return value is a string value that does not start with [WARNING] or [QUESTION] then the returned string is displayed to the user and the document will not be printed.
The Formula Editor
The Formula Editor is a text editor that displays a list of all of the mergefields that are relevant to the document type that you are working on.
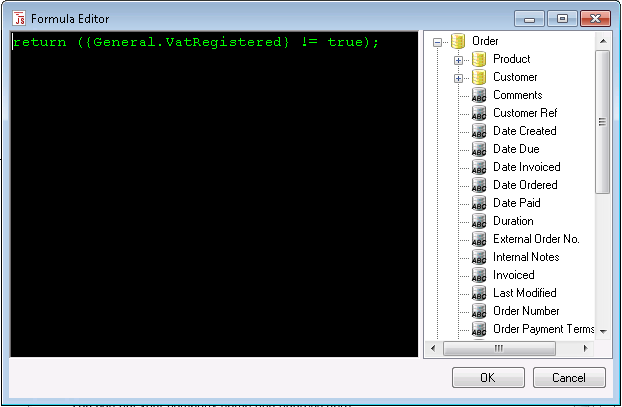
To the left is the text editor when you can type in JavaScript.
To the right is a tree view containing a list of all of the mergefields at your disposal.
Mergefields can be dragged from the right hand tree view into the text editor in much the same way as you would drag a mergefield onto a document. Alternatively you can type the name of the mergefield directly into the text editor by surrounding it with curly braces {}.
When you are done editing your code click the OK button to save your changes.

