Knowledge Base Overview
Whether you use the Knowledge Base is entirely optional and it has been included in Easify as it is a handy way to store information relating to your business.
You can organise the information you store here by creating your own Knowledge Base categories and articles, and assigning keywords to your articles so that they can be easily searched for.
The kind of information you can store here is only limited by your imagination, but some examples to get you started are things like:
- Your Company Handbook
- Company Procedures
- Supplier Login Information
- Company Details (for instance a lot of people can never remember their company VAT number or registration number)
- Anything else you can think of that would be handy to be able to look up
So if you fill the Knowledge Base with handy company info, and it will be available instantly from any PC on which you have Easify installed.
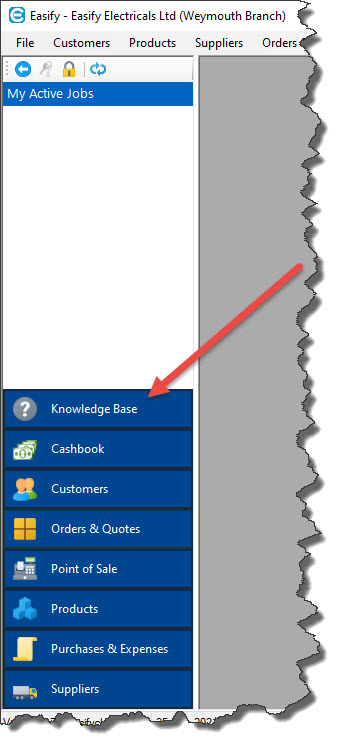
You can launch the Knowledge Base either via the large buttons in the bottom left of the Easify Pro Main Window:
or by clicking Help->Knowledge Base->View Knowledge Base on the Easify Pro main menu:

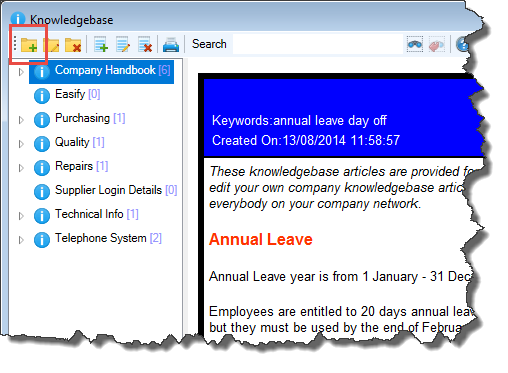
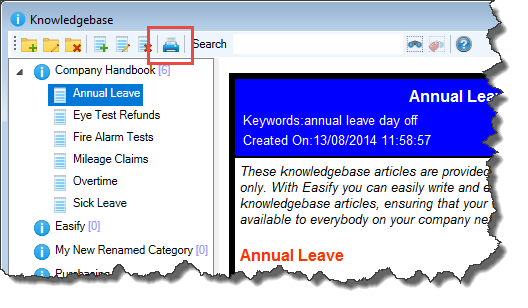
The main Knowledge Base view allows you to search for articles, view and print them, as well as manage and edit them.

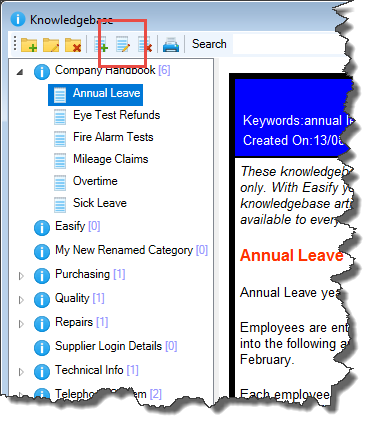
To the left of the Knowledge Base is a list of all the categories you have created for your Knowledge Base articles, expanding the categories will display the articles within them.
The selected article is displayed in the right hand pane of the Knowledge Base.
Across the top is a toolbar with various buttons that allow you to create, edit, print and search articles.
Creating a new Knowledge Base Category
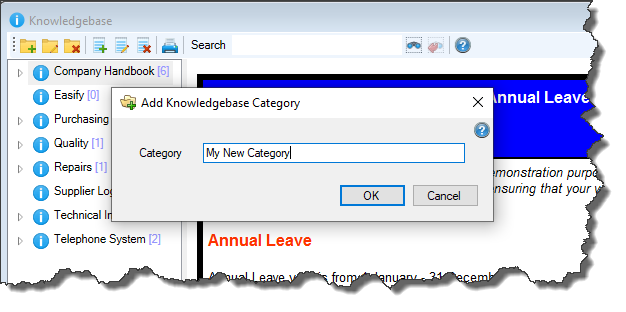
You can create a new Knowledge Base category by clicking the New Category button.
In the dialogue box enter the name for your new category and click OK when done.
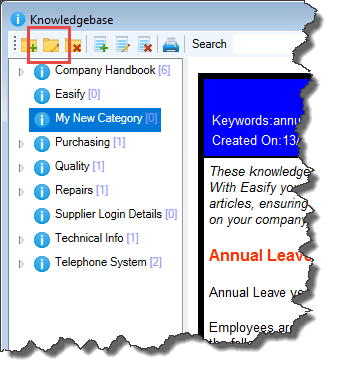
Your new category will appear in the category list.

Renaming a Knowledge Base Category
To rename a category, select the category and click the Edit Category button.
In the dialogue box change the category name as required and click OK when done.

Deleting a Knowledge Base Category
To delete a category, select it and click the Delete Category button.
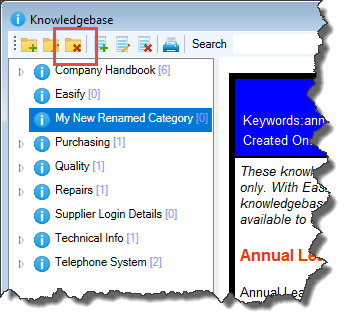
Easify will not let you delete a category that has articles in it.
Adding a New Knowledge Base Article
To add a new article, select the category that you wish to create the article under, and click the Add Article button.
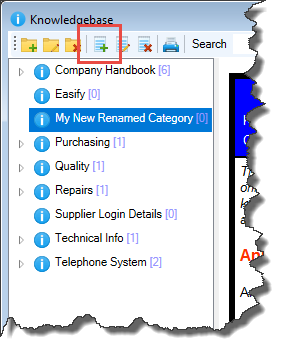
This will launch the Article Editor.

Click here for information about working with the Article Editor.
Editing a Knowledge Base Article
To edit an existing article, select the article and click the Edit Article button.
Click here for information about working with the Article Editor.
Deleting a Knowledge Base Article
To delete an article, select it and click the Delete Article button.

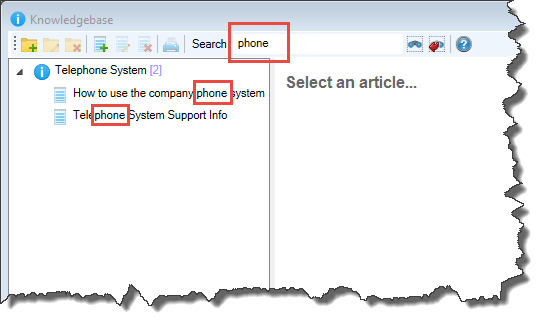
Searching for a Knowledge Base Article
To search for a particular article, enter a search word in the search box and click the search (binoculars) button pr press return.

The list of articles on the left will be filtered down to only show Knowledge Base articles that contain the keyword that you searched for, or articles that have the keyword that you searched for in their title.
To clear the current search click the Reset Search button.

Printing an article
To print an article, select it and click the Print Article button.
Click here for information about working with the Article Editor.
