
Installing an Orient BTP-M300 Thermal Receipt Printer
Firstly you will need to identify the Power Cable and the USB Data Cable that are shipped with the printer in the box. You will also need to know where they plug into on the printer.
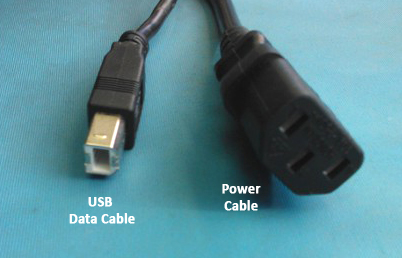
The cables we are concerned with that are supplied with the Orient BTP-M300 thermal receipt printer...
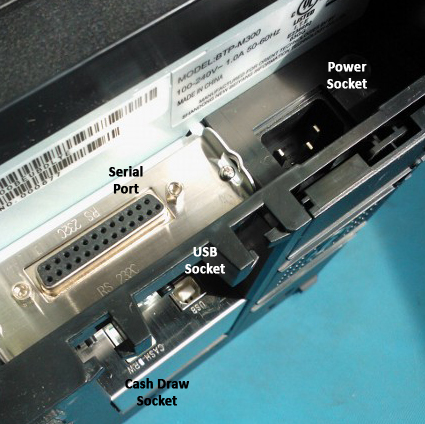
This picture labels the sockets that can be found on the back of the BTP-M300 thermal receipt printer...
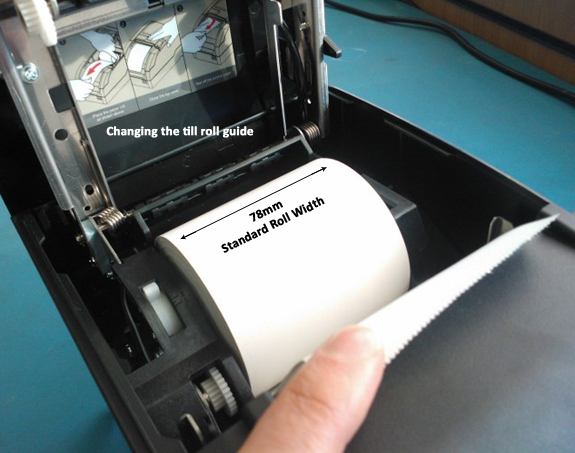
Next we recommend placing the till paper roll in the printer.
NB. If you turn the printer on without the till paper roll installed, it will continually beep until you turn it off.
Next you will need to download the printer driver setup software so that we can install the printer. We have provided a link to the driver setup software here:
BTP-M300 Thermal Receipt Printer Setup(Compatible with Windows XP/Vista/7/8/8.1)

Open the downloaded file, once it has completed downloading, then find and open the file named Setup, as shown in this screenshot...

Next you must read then accept the terms and conditions set by the printer manufacturer, then click the Next button...

Next make sure the Receipt option is selected and the BTP-M300 is the selected printer in the drop down box. Then click the Next button...

Next select Typical then click the Next button...

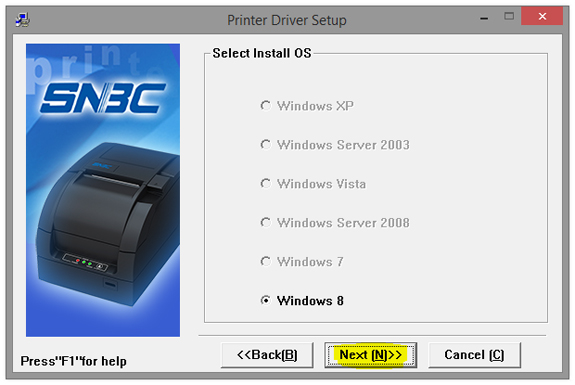
Next select the Windows operating system you currently have installed and click Next to continue...
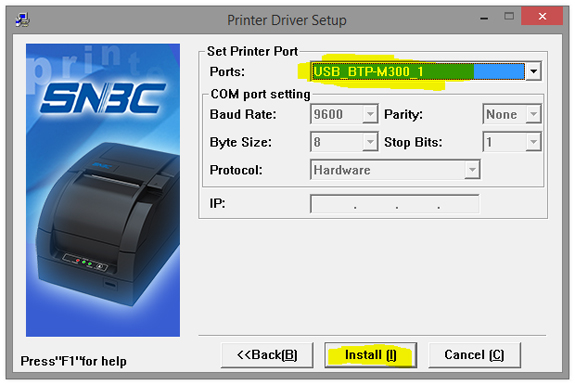
On this next screen make sure that you select USB_BTP-M300_1 from the Ports drop down box then click the Install button...

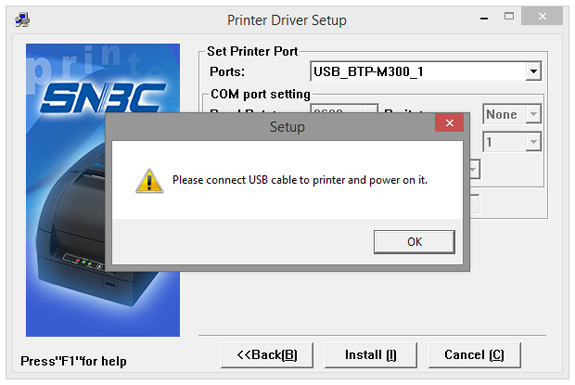
Now you will be asked to plug the printer into your computer via the USB cable. Once you have done so, click the OK button then the Install button...
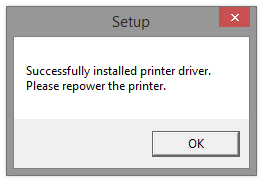
If you get this dialog box appear after the installation is complete, your printer has been installed successfully...
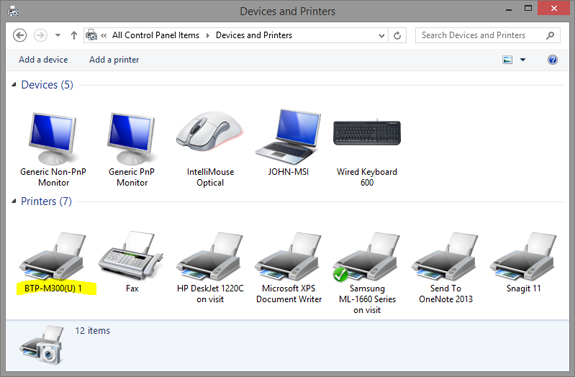
You should also check that the thermal receipt printer shows up on your list of installed printers found in your control panel...
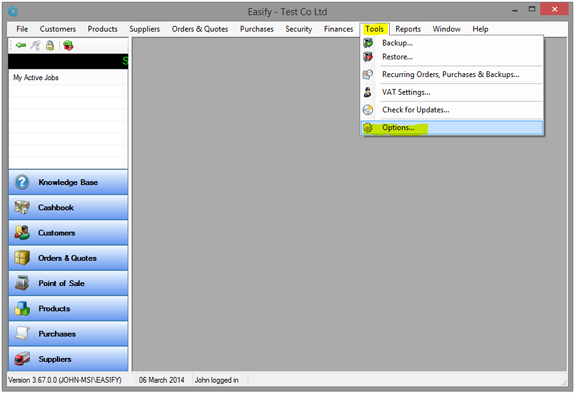
The final task is to let Easify know which printer we want to use for till receipts.
So let's log into Easify then go to Tools > Options > Point of Sale > Printing starting from the top Easify menu...
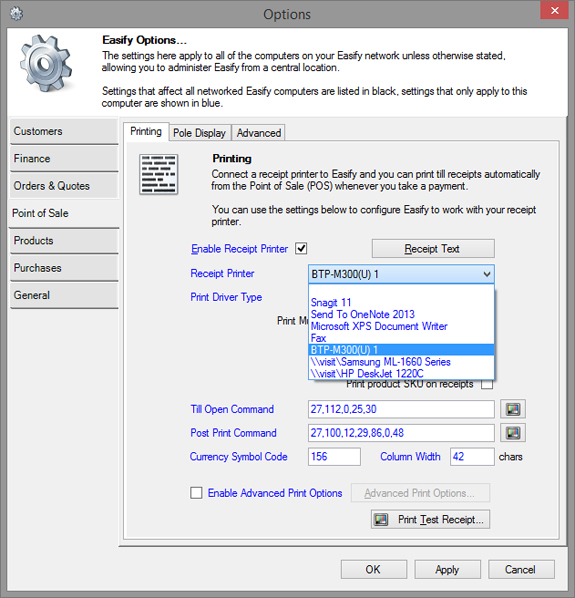
The final step is to go to select BTP-M300(U) 1 from the Receipt Printer drop down list, then press the Apply button...
You have now setup your thermal receipt printer to work with Easify!
