How to create and print an invoice
Here is a detailed guide on how to create and print an invoice.
If you're looking for a quick overview of the basic Easify functions please review the "Getting Started" video if you have not done so already.
For a more detailed description of how to create and print an invoice and all the widgets along the way, please continue to read this article.
- First you need to create a customer via the customers window.
Support article: http://www.easify.co.uk/help/hs540.aspx
- Then make sure you have products you can sell on the system.
If you are doing this for the first time, you will need to spend a little time settings a few things up...
1. Add a manufacturer
http://www.easify.co.uk/help/hs160.aspx
2. Add a supplier
http://www.easify.co.uk/help/hs170.aspx
3. Add category and sub category
http://www.easify.co.uk/help/hs180.aspx
4. Now you have the essentials setup to start adding products
- Now we can start creating an order that we can then print an invoice off for.
So right click on the desired customer record in the customers window and select "Create New Quote/Order..."
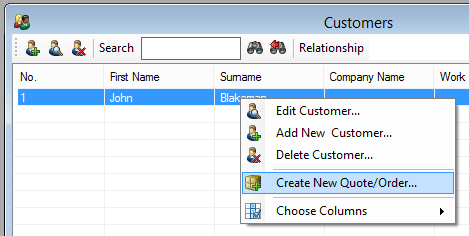
- Next you need to add the products onto the order...
This can be done in three different ways, noted below.
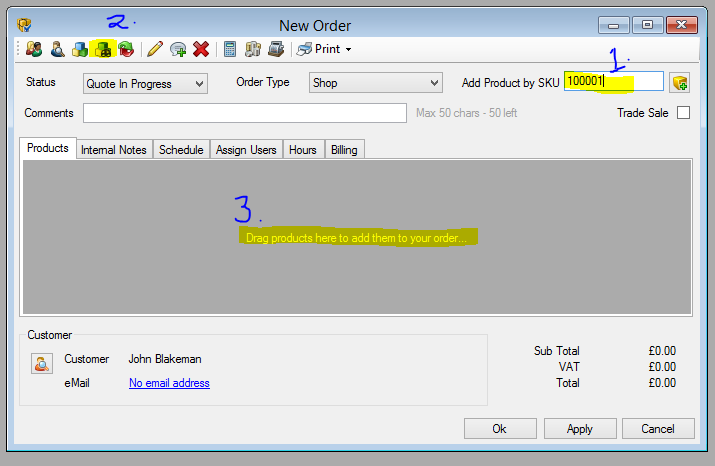
Method 1. Add a product by typing in its SKU number (this number is auto generated by Easify when a product is added to the system).
Method 2. Use the product search facility to find the product you are looking for.
Method 3. Drag and drop a product from the products window to the order window.
- There are various settings at this point that I shall explain:
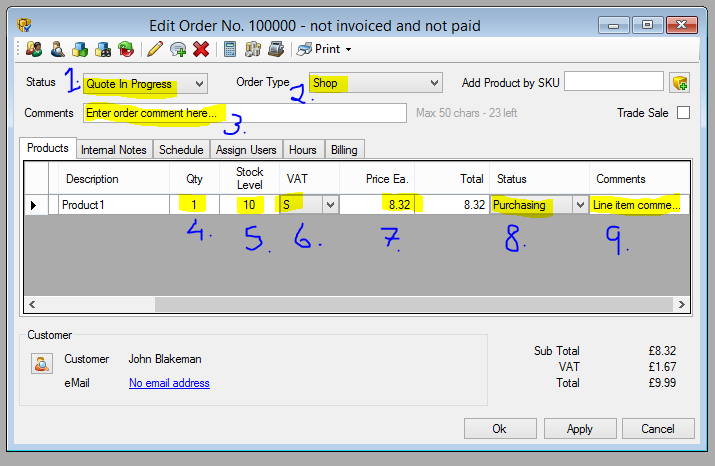
1. Change the status of your order. This is to help identify at what stage an order is at.
If you wish to customise the order statuses so that they more accurately reflect your business model, please review this article.
http://www.easify.co.uk/help/hs330.aspx
2. Change the type of your order. This is to help categorise the order, so for example you know where the order came from or what type of order it is.
If you wish to customise the order types please review this article:
http://www.easify.co.uk/help/hs340.aspx
3. Enter a comment that summarises the order. This will appear on the invoice. This is a required field, meaning you cannot save the order until you have entered a value into the comments field.
4. Enter the Quantity, to reflect the number of the item you are supplying to your customer.
5. This value tells you how many you currently have in stock.
To change the stock control options please refer to this guide:
http://www.easify.co.uk/help/hs280.aspx
6. Change the VAT you wish to charge on this item.
Please review these three support articles to help customise Tax settings:
http://www.easify.co.uk/help/hs130.aspx
http://www.easify.co.uk/help/hs360.aspx
http://www.easify.co.uk/help/hs277.aspx
7. This is the sell price (excluding tax) that is set for the selected line item (product).
Please use the calculator button on the top bar of the order for assistance calculating price changes.
8. This drop down box is used to identify and set the status of each line item.
This article describes each status:
http://www.easify.co.uk/help/hs590.aspx
9. Use this field if you wish to add any comments to a line item (that will appear on customer facing paperwork, such as an invoice).
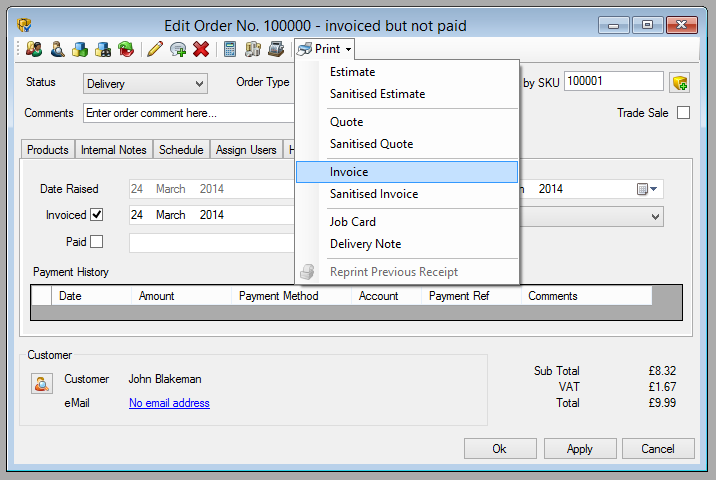
- We're almost there, but before you can select Invoice from the order print menu, you must first mark the order as "Invoiced" under the "Billing" tab.
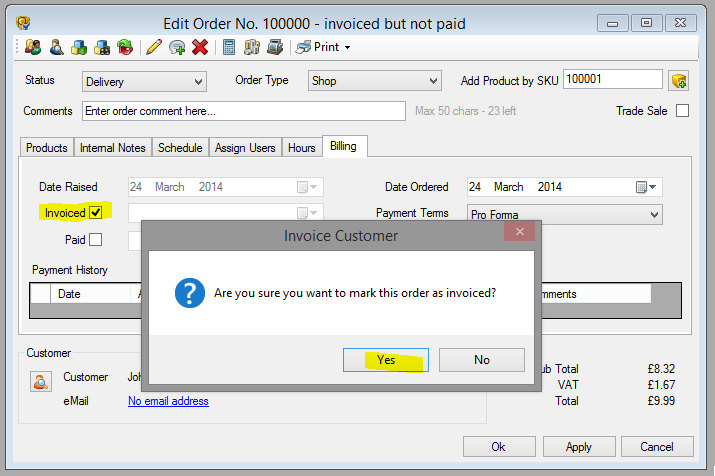
- Now select "Invoice" from the "Print" menu.
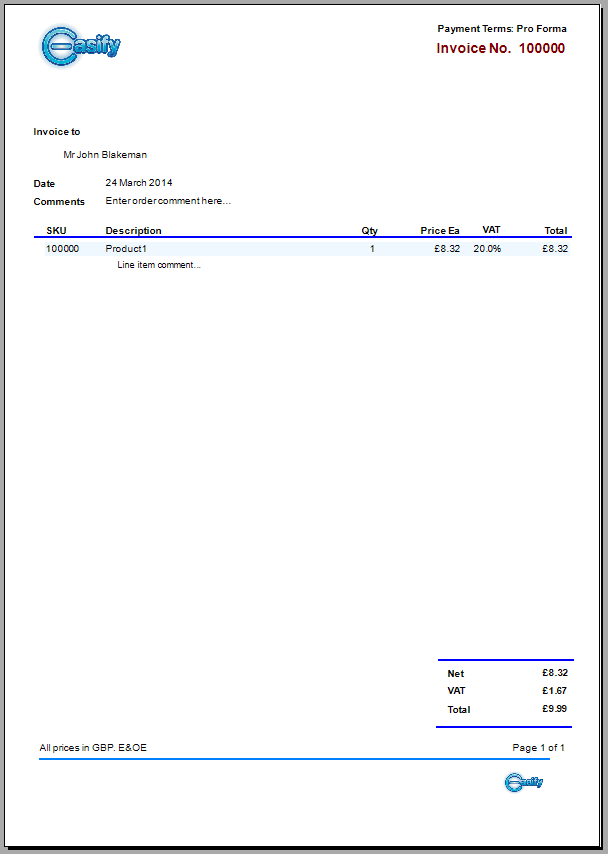
- You will now see your invoice which is ready to print.
If you wish to customise the header and footer of your customer facing paperwork, please review these forum post:
http://www.easify.co.uk/forums/viewtopic.php?f=6&t=67
Happy to help - John (Easify Support)

