Finance - Doing a Reconciliation
Reconciling for the first time
When you start your first reconciliation, every payment for every sale or purchase will show in the reconciliation window. Obviously you probably don’t want this as it will make it difficult to perform any new reconciliations. Therefore we recommend the following:
Option 1
Go back through all your past records and reconcile your accounts.
Option 2
Perform a ‘dummy’ reconciliation to effectively ‘hide’ all your old data from the reconciliation window.
If you have only been using Easify for a short period of time you might want to chose option 1 as it’s a good way to make sure that you haven’t missed any payments. If you’ve been using Easify for a number of years you’ll probably want to chose option 2.
How to get ready for your First Reconciliation
First of all you will need to set up some details for each account that you’re going to be reconciling – you’ll only need to do this the once for each account.
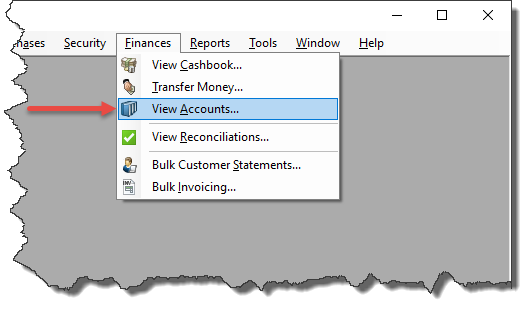
In Easify, click on Finances -> View Accounts and double click to select the account that you’re going to be reconciling

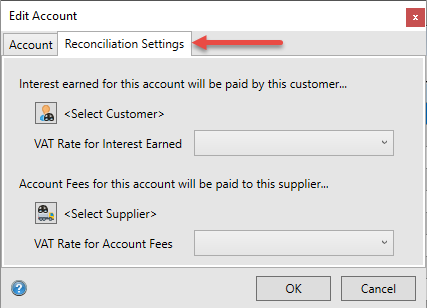
Click on the Reconciliation Settings tab.
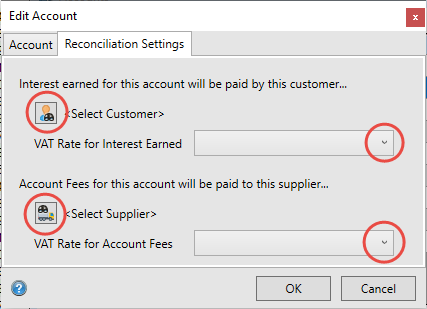
In order for you to receive a payment for your Interest Earned, Easify will need you to select a ‘Customer’ – in most instances this will be your bank as they will be paying you interest on any savings you might have. Also remember to select the VAT code – in most instances in the UK this will be E (Exempt) but check with your accountant if you’re not sure.
In order for you to make a payment for your Account Fees, Easify will need you to select a ‘Supplier’ – in most instances this will be your bank as they will be charging you fees to use your bank account. Also remember to select the VAT code – in most instances in the UK this will be O (Outside the Scope of VAT) but check with your accountant if you’re not sure.
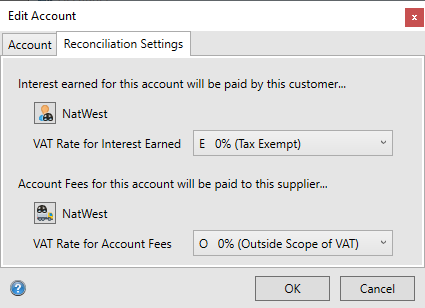
Now click OK to save the changes. Once you have completed the step above you’re ready to reconcile that account for the first time.
Note: You can easily add a customer record and a supplier record for your bank in Easify if you don't already have one.How to perform Option 1 – Reconciling for the first time
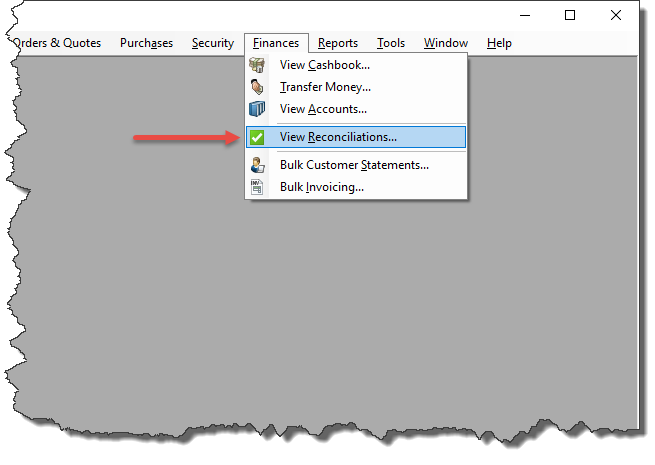
In Easify, go to Finances –> View Reconciliations. This will open the Reconciliations window where all your reconciliations will show.
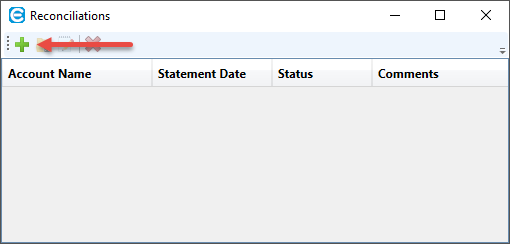
If you haven’t previously performed any reconciliations this will show blank. Click on the + sign to start your first reconciliation.
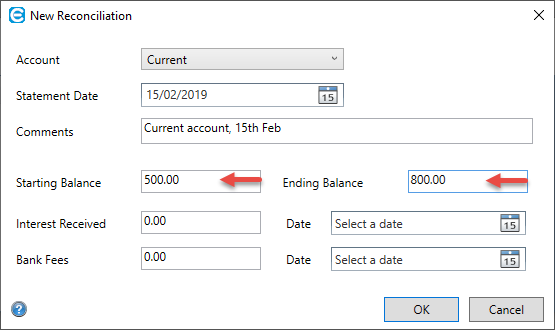
This will bring up the New Reconciliation window.
Select the account you will be reconciling. Remember you’ll need to complete the steps listed under How to get ready for your First Reconciliation first.
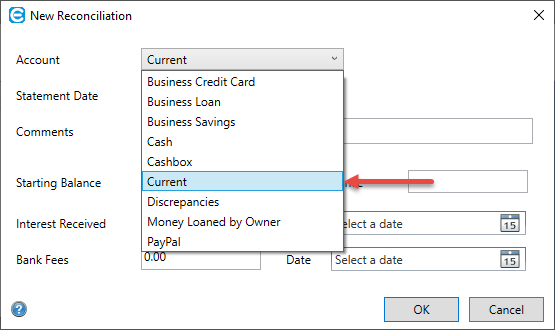
Statement Date – this is usually the date that your bank statement is dated.

Enter some Comments – these are for your own reference only, and so you can find the reconciliation again if you need to.
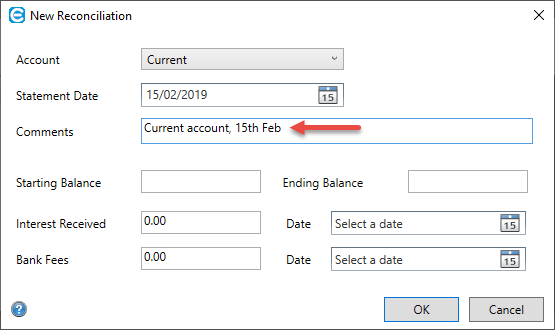
Enter a starting balance – you should be able to find this on your bank statement.
Enter an ending balance – again you should be able to find this on your bank statement.
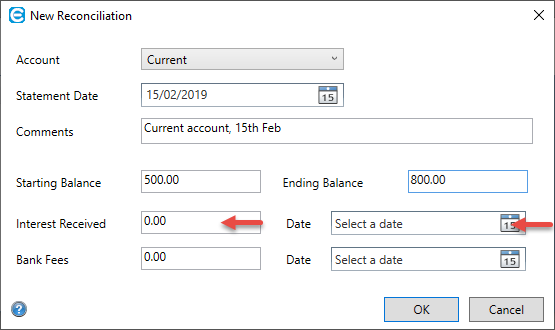
Enter any Interest Received – this will be any interest you have earned on your bank account. Easify will automatically raise an order for this amount. Select a date for when you earned this money .
Enter any Bank Fees – this will be any bank fees, service charges or interest you have paid to your bank. Easify will automatically raise a purchase for this amount. Select a date for when you were charged this money.
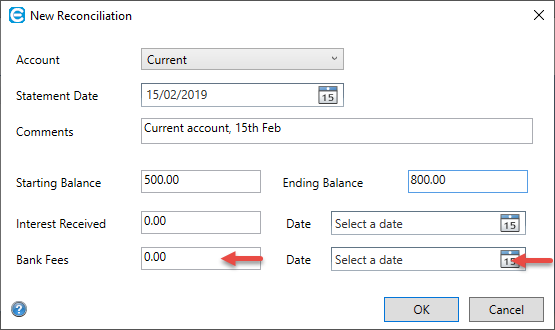
Remember, if you’ve already raised a purchase for any fees – for instance you might have already received an invoice from your bank, don’t include that amount here otherwise it will be accounted for twice.
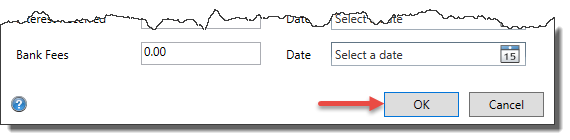
Click Ok – you’re now ready to perform your first reconciliation.
Under the main Reconciliation window you will see all Receipts and Payments for the Account you’ve selected. You can sort by any column to make it easier. You can display this window full screen if it helps.
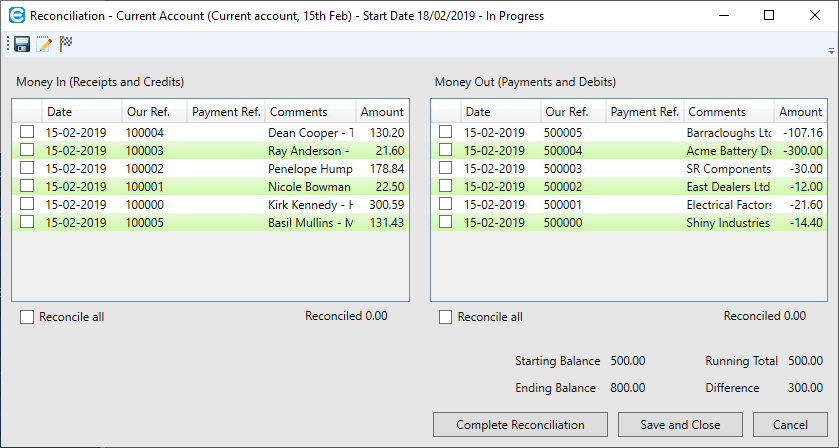
Work your way through you bank statement ticking off every receipt and payment. You’ll need to click on the line first to highlight and then tick the tickbox. This might seem a bit cumbersome, however it’s really helpful in preventing you from accidentally clicking the wrong transaction.
Alternatively if you prefer you can use the arrow keys to scroll up and down and then press the space bar to tick the tickbox.
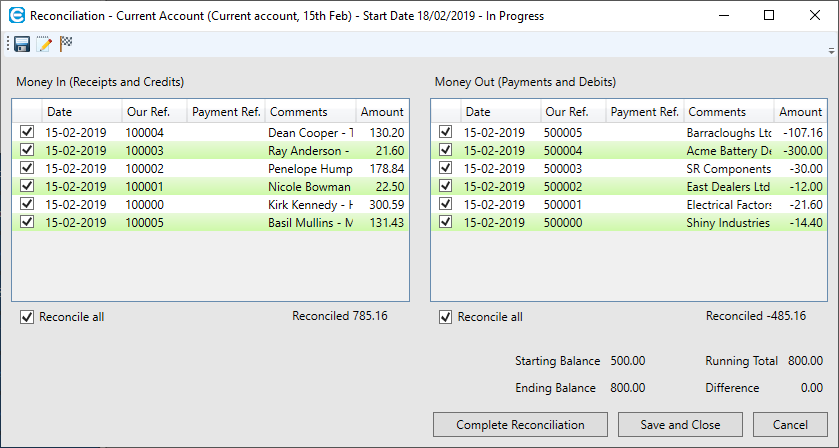
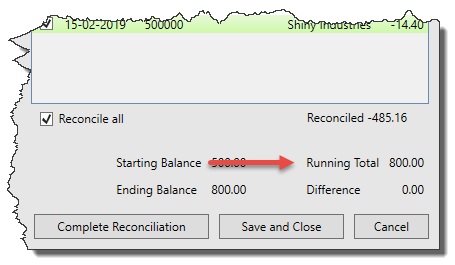
Keep an eye on the Running Total as this should match the balance on your bank statement as you work your way through your statement.
If the running total is different to the balance on your bank statement, then you’ve either:
- Ticked the wrong transaction
- Forgot to tick a transaction
- Got an error in the amount on a payment or receipt – .ie. the amount on the Order or Purchase is different to that shown on your bank statement.
- Made an error with your starting balance.
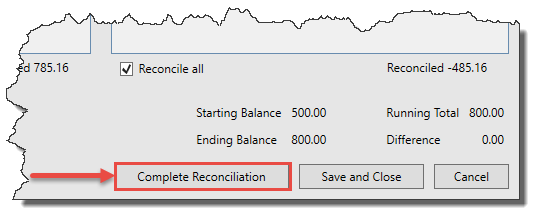
When you’ve ticked all the transactions in the Reconciliation window that are shown on your bank statement, your Running Total should be the same as your Ending Balance. If that is the case, then you’re ready to select ‘Complete Reconciliation’.
TIPS
- You can save a reconciliation as many times as you wish before completing it.
- You can perform as many reconciliations as you wish for any period – i.e. rather than performing a reconciliation for a whole VAT quarter (i.e. 3 month) you might prefer to perform 3x monthly ones.
- If there’s an error on a payment on receipt, save the reconciliation and go into the Cashbook or Order or Purchase to fix the error. You can then continue with the reconciliation.
- Easify will allow you to complete a reconciliation even if the Running Total is different to the Ending Balance, however this is not recommended. It’s better to go back and work out where the error occurred.
Once you’ve Completed the Reconciliation it will show in the Reconciliations window under Complete.
Once a Reconciliation is completed you will not be able to change it, nor will you be able to change any payment or receipt that has been reconciled within a Completed Reconciliation.
How to perform Option 2 – Reconciling all old data
Follow the steps above to start your first reconciliation and call your reconciliation ‘Reconciling old Data’ or similar. You’ll need to enter a Statement Date, Starting Balance and Ending Balance – however as this is not a ‘real’ reconciliation you can enter anything here.
Don’t worry about entering anything in the Interest Received or Bank Fees boxes.
Click Ok to start the Reconciliation.
This will bring up the main Reconciliation window.
Tick on the Date Column to sort by Date – the date shown here is the date that the payment was made.
Sort the column so that the oldest transaction is at the top of the column. You can display this window full screen if it helps.
Tick any transactions that are too old to appear in any current Reconciliations that you will be performing. For instance if you’re using the reconciliation feature to record all your payments as from April 2019, you might want to mark any transactions up to the end of 2018 as reconciled.
Remember – that once a reconciliation is Completed you won’t be able to change anything so it’s worth bearing on the side of caution and don’t reconcile anything too close to your real reconciliation date.
You can always perform this action more than once if you need do. These aren’t ‘real’ reconciliations, they’re merely to hide any old data from the Reconciliation window so you only see current data when reconciling.
